
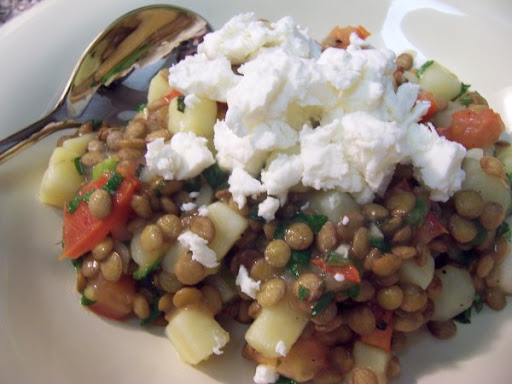
 We had this last week, maybe the week before. I was really excited about it because it was cold and icky outside, and I like to think that this was a decently healthy dinner. Sure, I crumbled a ton of goat cheese on top.... and then topped the goat cheese with a poached egg (not pictured because it didn't photograph well.) But other than cheese and egg, it was totally healthy! :)
Now, I try to keep a decent amount of herbs on hand... its easier in the summer, when I have them potted outside... but if you have parsley and mint, and also have a decently stocked pantry, you could make this for dinner in a pinch. Try it, you'll like it.
Goat Cheese, Lentil and Potato Salad
c/o Food & Wine magazine, October 2007
http://www.foodandwine.com/recipes/goat-cheese-lentil-and-potato-salad
1 1/4 cups French green lentils (9 ounces), rinsed and drained
2 Yukon Gold potatoes (about 14 ounces), peeled and cut into 1/2-inch dice
3 scallions, thinly sliced
2 medium tomatoes, seeded and finely diced
1/2 cup finely chopped flat-leaf parsley
1/4 cup finely chopped mint
1 large garlic clove, minced
1/2 cup extra-virgin olive oil
1/4 cup fresh lemon juice
Kosher salt and freshly ground pepper
8 ounces fresh goat cheese, crumbled (1 3/4 cup)
In a large saucepan, cover the lentils with cold water and bring to a simmer. Cook over moderately low heat, stirring occasionally, until the lentils are tender, about 18 minutes. Drain the lentils well and transfer to a large bowl.
Meanwhile, in a medium saucepan, cover the potatoes with cold water and bring to a boil. Cook over moderately high heat until the potatoes are tender, about 10 minutes. Drain very well and add to the lentils. Add the scallions, tomatoes, parsley, mint, garlic, olive oil and lemon juice, season with salt and pepper and toss. Spoon the lentil salad onto plates and top with the goat cheese. Serve at once.
Make ahead: The cooked lentils and potatoes can be refrigerated overnight. Bring to room temperature before serving.
Wine: Though lentils are earthy, the tangy dressing and goat cheese are natural partners for Sémillon's lemony, zesty flavors. Stephanie Toole's lively 2006 Mount Horrocks Sémillon is a classic example.
Friday, December 28, 2007
Goat Cheese, Lentil and Potato Salad

Thursday, December 27, 2007
That Hungry Blonde Girl
 In early November, Janet posted about these yummy cups. I knew as I was reading them that we'd be eating them. This recipe has all you could ask for... ease of preparation, mexicany-ness, and single serving sizing.
I'd linked the blog to my husband, so he knew what he was getting into... and so he'd stop asking me what we were having for dinner. :)
I got home, whipped these together and I think we ended up gobbling them all up. (Or we at least finished them off at lunch the next day.)
I'll close with what Dave said after he had his first one, once he'd asked me where she got it, and I explained that I think she made it up on her own: "That Hungry Blonde Girl is smart!!!" So true, so true.
Find the recipe here!
Meyer Lemon Curd: The Cure for Nightmares
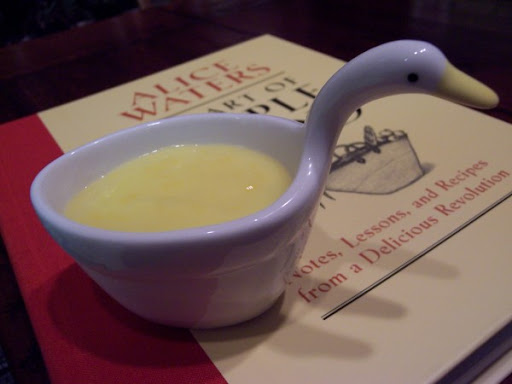 I had a whole list of things I was assigned to do tonight. Dave went off to the hockey game and made me promise that I would sharpen knives and research steam cleaners and cameras, that I would do laundry and figure out what to do with the black truffles that Santa brought us yesterday.
Did I do any of those things? Maybe a couple. The truffles I took care of (and I even grocery shopped for the dinners these truffles have shaped.) But that's where it stops.
Let me tell you about the dream I had last night. In my dream, I was running. Not running FROM something, just running for fun. I remember it was on a college campus, and the buildings were old, the trees full and leafy. I remember the thrill of the run, how much I was enjoying myself. And then I took a wrong turn, a shortcut down a "dark alley." I made another turn down another alley... thought nothing of it. Until I saw the gang of unsavory men. Of course it was dark outside and I was alone. I turned around and tried to flee out the way I came. When I arrived to the first alley's entrance, I found the men had blocked my path. I was trapped.
To escape, I climbed a fence and over a wall. I found myself on a strange woman's roof. She'd seen what was happening and offered to hide me. She did.
She turned me into a cookie. And I was terrified.
I woke up at that point. Scared to pieces that I was trapped in a cookie. I relayed this dream to my husband hours later, and then wondered aloud if that's how the Gingerbread Man felt... and he just patted my knee and said, "O, honey."
Thank goodness the holidays are over! :)
My point with that silliness is that if you ever need to snap out of a weird dream, a bad day, traffic, whatever... I highly suggest this lemon curd! (Totally round-about way of getting here, eh?) My in-laws were kind enough to gift me with Alice Water's The Art of Simple Food for Christmas, and the first recipe I chose was a lemon curd. I can't explain why, because I don't know. I saw it and it called to me. I wish you could have been with me in the kitchen.... you could see the oils as I grated the lemons (and my hands are still scented with them) or the way the steam seductively rose off the pan as I stirred... As I listened to my (also new, but from my mom) Amelie soundtrack, I really felt... happy... safe... You know you've had those cooking moments.. when everything works and you're just so present to be almost in love with what you're doing? Ah.
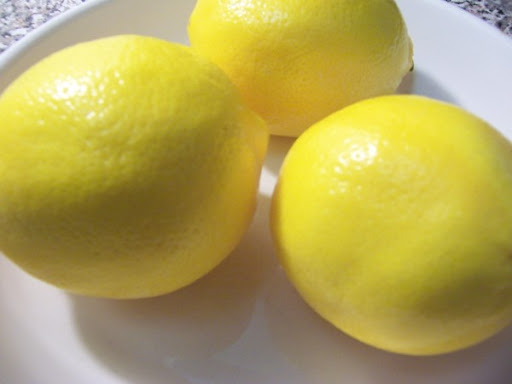
Alice Waters suggests swapping out three Meyers for regular... and says that you only need 1/2 cup juice... my lemons were so big, I only needed two. This means I have two spare for something else... I'll keep them on my bedside table, in case I have any more bad dreams.
Lemon Curd
c/o The Art of Simple Food, by Alice Waters
Makes 2 cups
Wash and dry:
4 lemons
Grate the zest of one of the lemons on the small holes of a grater. Juice the lemons; there should be about ½ cup juice.
Beat until just mixed:
2 eggs
3 egg yolks
2 tablespoons milk
1/3 cup sugar
¼ teaspoon salt (omit if using salted butter)
Stir in the lemon juice and zest and add:
6 tablespoons butter, cut into small pieces.
Cook the mixture in a small nonreactive heavy pan, stirring constantly, over medium heat until it is thick enough to coat a spoon. Do not boil or the eggs will curdle. When thick, pour into a bowl or glass jars to cool. Cover and refrigerate.
Variations:
With their sweeter juice and perfumed peel, Meyer lemons make an especially good curd. Make the recipe with the juice of 1 regular lemon and 3 Meyer lemons and the grated zest of 2 Meyer lemons.
To make frosting, fold lightly sweetened whipped cream into lemon curd. I usually use equal parts whipped cream and curd.
Tuesday, December 25, 2007
Merry Merry Christmas!!!

Monday, December 24, 2007
Ho! Ho! Hoho?

Merry Almost Christmas!!! The lovely and amazing leaders of the Daring Baker clan chose for your pleasure the traditional and charming Yule Log. I got a little silly with my planning and decided to try to model my log after the much loved Hoho snack cake: marshmallow filling, chocolate cake, chocolate icing... in my mind, this log came out perfect and round and amazing... instead.....
I think the theme (for me) for this month's challenge is: Thank goodness for icing!!!
I wish you could have all been here with me as I whipped this cute little "log" together. The hubs and I have been sick for a week, so I put this off as long as possible. I didn't even go out to get the 10x15 inch pan until this afternoon... didn't get started until 4... but I had the cake baked and the buttercream done by 5... the marshmallow filling by 6... and let me tell you... each piece is delicious. You really can't go wrong with Dorie's marshmallow recipe, and seriously, butter and chocolate make EVERYTHING dreamy....
O wait, did I leave out the marzipan mushrooms? Erm... well... they were weird and smooshy and well... wouldn't stay looking like actual mushrooms for long... which is why there are only two with my Hoho yule log.
Anyway.... everything was grand until I tried to actually roll my genoise up... my guess is that my addition of cocoa powder and hazelnuts dried out my cake a little too much, because the cake cracked on each roll... which is why it's more plank-shaped. Oops!
No worries! I just covered the whole thing with the tasty icing! Yay! Now, I know the recipe called for coffee-flavored buttercream... but neither my husband nor my mom care for coffee (and they outnumber me)... and I have a smell-aversion to it now (from the last time I got sick), so I went chocolate instead. To the buttercream, I added about 1/3 cup of melted and cooled bittersweet chocolate.
Once the yule hoho was covered in buttercream, I ran a knife around on it to make the "bark" of the log. Yah, its sloppy, but I think it's cute.
Overall, this was a real learning experience for me. I'd never made buttercream before (totally easy) and I'd never made a genoise before, much less rolled it up. I'm more than happy to try again with another, but I'll make sure to stick to the directions!!
I'll check in again before/on Christmas, but in case you don't, I hope you all have a safe, happy, and relaxing holiday!!
Click here to see what the other Daring Bakers came up with!
The Yule Log Recipe
Plain Genoise:
3 large eggs
3 large egg yolks
pinch of salt
¾ cup of sugar
½ cup cake flour - spoon flour into dry-measure cup and level off (also known as cake & pastry flour)
¼ cup cornstarch
one (1) 10 x 15 inch jelly-roll pan that has been buttered and lined with parchment paper and then buttered again
1.Set a rack in the middle of the oven and preheat to 400 degrees F.
2.Half-fill a medium saucepan with water and bring it to a boil over high heat. Lower the heat so the water is simmering.
3.Whisk the eggs, egg yolks, salt and sugar together in the bowl of a heavy-duty mixer. Place over the pan of simmering water and whisk gently until the mixture is just lukewarm, about 100 degrees if you have a thermometer (or test with your finger - it should be warm to the touch).
4.Attach the bowl to the mixer and, with the whisk attachment, whip on medium-high speed until the egg mixture is cooled (touch the outside of the bowl to tell) and tripled in volume. The egg foam will be thick and will form a slowly dissolving ribbon falling back onto the bowl of whipped eggs when the whisk is lifted.
5.While the eggs are whipping, stir together the flour and cornstarch.
6.Sift one-third of the flour mixture over the beaten eggs. Use a rubber spatula to fold in the flour mixture, making sure to scrape all the way to the bottom of the bowl on every pass through the batter to prevent the flour mixture from accumulating there and making lumps. Repeat with another third of the flour mixture and finally with the remainder.
7.Scrape the batter into the prepared pan and smooth the top.
8.Bake the genoise for about 10 to 12 minutes. Make sure the cake doesn’t overbake and become too dry or it will not roll properly.
9.While the cake is baking, begin making the buttercream.
10.Once the cake is done (a tester will come out clean and if you press the cake lightly it will spring back), remove it from the oven and let it cool on a rack.
Coffee Buttercream:
4 large egg whites
1 cup sugar
24 tablespoons (3 sticks or 1-1/2 cups) unsalted butter, softened
2 tablespoons instant espresso powder
2 tablespoons rum or brandy
1.Whisk the egg whites and sugar together in the bowl of an electric mixer. Set the bowl over simmering water and whisk gently until the sugar is dissolved and the egg whites are hot.
2.Attach the bowl to the mixer and whip with the whisk on medium speed until cooled. Switch to the paddle and beat in the softened butter and continue beating until the buttercream is smooth. Dissolve the instant coffee in the liquor and beat into the buttercream.
Meringue Mushrooms:
3 large egg whites, at room temperature
¼ teaspoon cream of tartar
½ cup (3-1/2 ounces/105 g.) granulated sugar
1/3 cup (1-1/3 ounces/40 g.) icing sugar
Unsweetened cocoa powder for dusting
1.Preheat the oven to 225 degrees F. Line 2 baking sheets with parchment. Have ready a pastry bag fitted with a small (no. 6) plain tip. In a bowl, using a mixer on medium-low speed, beat together the egg whites and cream of tartar until very foamy. Slowly add the granulated sugar while beating. Increase the speed to high and beat until soft peaks form when the beaters are lifted. Continue until the whites hold stiff, shiny peaks. Sift the icing sugar over the whites and, using a rubber spatula, fold in until well blended.
2.Scoop the mixture into the bag. On one baking sheet, pipe 48 stems, each ½ inch (12 mm.) wide at the base and tapering off to a point at the top, ¾ inch (2 cm.) tall, and spaced about ½ inch (12 mm.) apart. On the other sheet, pipe 48 mounds for the tops, each about 1-1/4 inches (3 cm.) wide and ¾ inch (2 cm.) high, also spaced ½ inch (12 mm.) apart. With a damp fingertip, gently smooth any pointy tips. Dust with cocoa. Reserve the remaining meringue.
3.Bake until dry and firm enough to lift off the paper, 50-55 minutes. Set the pans on the counter and turn the mounds flat side up. With the tip of a knife, carefully make a small hole in the flat side of each mound. Pipe small dabs of the remaining meringue into the holes and insert the stems tip first. Return to the oven until completely dry, about 15 minutes longer. Let cool completely on the sheets.
Marzipan Mushrooms:
8 ounces almond paste
2 cups icing sugar
3 to 5 tablespoons light corn syrup
Cocoa powder
1.To make the marzipan combine the almond paste and 1 cup of the icing sugar in the bowl of an electric mixer and beat with the paddle attachment on low speed until sugar is almost absorbed.
2.Add the remaining 1 cup of sugar and mix until the mixture resembles fine crumbs.
3.Add half the corn syrup, then continue mixing until a bit of the marzipan holds together when squeezed, adding additional corn syrup a little at a time, as necessary: the marzipan in the bowl will still appear crumbly.
4.Transfer the marzipan to a work surface and knead until smooth.
5.Roll one-third of the marzipan into a 6 inches long cylinder and cut into 1-inch lengths.
6.Roll half the lengths into balls. Press the remaining cylindrical lengths (stems) into the balls (caps) to make mushrooms.
7.Smudge with cocoa powder.
Assembling the Yule Log:
1.Run a sharp knife around the edges of the genoise to loosen it from the pan.
2.Turn the genoise layer over (unmolding it from the sheet pan onto a flat surface) and peel away the paper.
3.Carefully invert your genoise onto a fresh piece of parchment paper.
4.Spread with half the coffee buttercream (or whatever filling you’re using).
5.Use the parchment paper to help you roll the cake into a tight cylinder.
6.Transfer back to the baking sheet and refrigerate for several hours.
7.Unwrap the cake. Trim the ends on the diagonal, starting the cuts about 2 inches away from each end.
8.Position the larger cut piece on each log about 2/3 across the top.
9.Cover the log with the reserved buttercream, making sure to curve around the protruding stump.
10.Streak the buttercream with a fork or decorating comb to resemble bark.
11.Transfer the log to a platter and decorate with your mushrooms and whatever other decorations you’ve chosen.
Tuesday, November 27, 2007
Tender is the Daring Baker



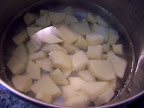
I don't have a food scale... this recipe called for between 8 and 16 ounces of potato... I kinda went with it, figuring that I'd know when to stop with the flour. For the most part, I think that worked out ok for me.
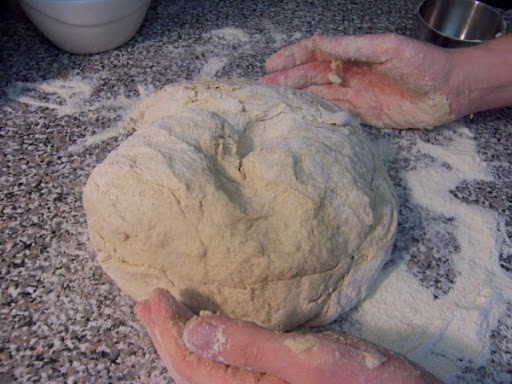
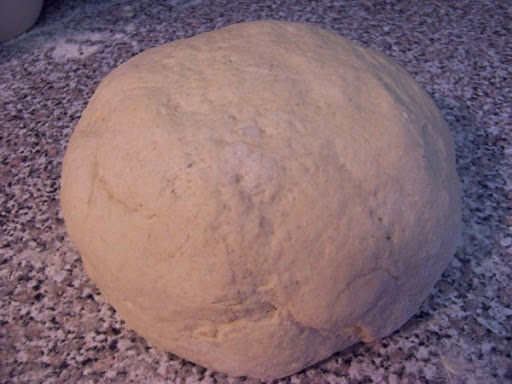
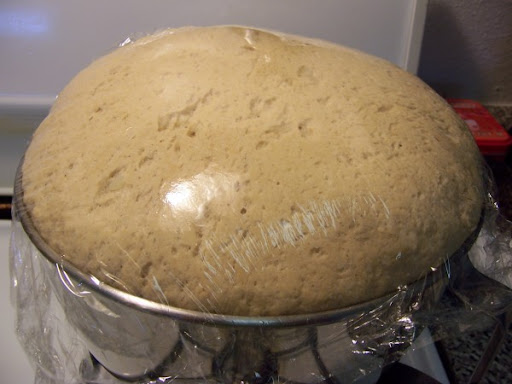
Boy, was this dough sticky!!! Sticky and TOTALLY FUN!!!! I always use my stand mixer to knead in dough, so the actual process of kneading by hand was a new experience for me. Yah, you'll read about hour therapeutic it can be... how relaxing... and while you might think its weird or bunk... it isn't. (unless, of course, you have hand/arm problems, and then I can see it being much more of a chore.) I worked about 8 cups of the flour called for and it came together in a nice, elastic dough. (And as you can see, my rise was big and poofy!!
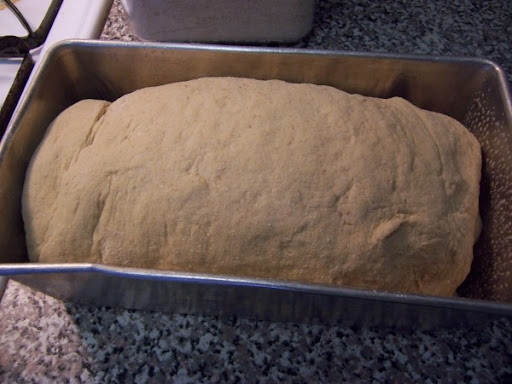
I don't think I took shots of my loaf and rolls after the second rise. The rolls came out funny-looking... I think I either fiddled with them too much getting them into roll-shapes, or they didn't rise enough.
The bread was thick and chewy yet nicely soft and tender. I don't have enough experience with breadmaking to be able to tell you how this is possible... chewy yet tender... but it defies science. Defied-Science that tasted great slathered with ham salad! :)
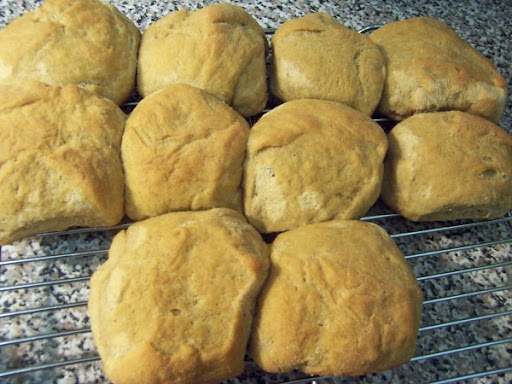
Please head on over to Tanna's site, My Kitchen in Half Cups, for the delicious and satisfying recipe. To see almost 400 other versions of this bread (because mine is certainly way less interesting than theirs!!), head on over to the Daring Baker Blogroll!!
(and again, my apologies for being Ms. Late-ypants!!) See the recipe...
Sunday, November 18, 2007
Chipotle Chicken Tacos
 This might not be the best photo in the world... You're lucky you have a photo at all, actually. I'd piled my toppings on these babies and was headed out the door when the little quiet voice in my head said, "Take a picture, fool!!"... so I tried to push some of the lettuce and cilantro out of the way so you could see the actual filling... O well. Just trust me that there is some tasty chicken, pepper jack cheese and sour cream under all that greenery.
Photo snapped, I proceeded to join the hubs in front of the tv (football was on!!!). I took a bite, looked at him and said, "Dif if dewifuff!!!!" (yes, Mom, my mouth was full.) Seriously dewifuff.
The filling was nice and spicy, but the cool, creamy sour cream cut it so that it was the right amount of hot. (Meaning, it didn't make me cry this time!) Now, I did mess with it a little. (Big surprise.) Rather than add the can of diced tomatoes, I used an already-opened jar of salsa. Same difference, I thought. The salsa was "chipotle" flavored, so I kept to the theme. My suggestion to you would be: Use tomatoes if you have them or if you want milder tacos, but feel free to use whatever salsa you have on hand or like. My other suggestion: Make sure you get quality corn tortillas. Ours split down the middle, leading to rather messy eating.
I cannot fully express my love for these tacos. They were the absolute perfect meal for us last night. It was cold outside and in and I was in one of those Pajama Sunday kind of moods. You cannot go wrong with this recipe.
Chipotle Chicken Tacos
c/o Culinate
http://www.culinate.com/search/q,vt=top,q=chipotle+chicken+tacos/2188
For the chicken
2 Tbsp. canola or olive oil
1 small onion, finely chopped
2 cloves of garlic, crushed
¾ tsp. dried oregano, freshly crumbled
¼ tsp. freshly ground black pepper
1 cup chicken broth
1 (14½ oz.) can whole tomatoes, chopped, with juice
1 lb. boneless, skinless chicken thighs (or breasts if you prefer)
1 to 2 chipotle peppers canned in adobo sauce, finely chopped
1 cinnamon stick
1 whole piece of star anise
Salt to taste
For the tacos
8 to 12 corn tortillas
1 cup grated jack cheese
1 cup fresh cilantro, washed, dried and destemmed
1 cup romaine lettuce, washed, dried and cut into shreds
Sour cream (optional
In a large saucepan over medium heat, heat the oil. Add onion, garlic, oregano, and pepper. Cook until the onion begins to soften and turn brown on the edges; add the stock, the juice from the tomatoes, and the chicken.
Bring to a simmer, cover, and cook until the chicken is cooked through, about 10 minutes. Remove the chicken from the pan and set aside to cool.
Add chopped tomatoes, chipotle peppers, cinnamon, and star anise to the pot, and simmer 15-20 minutes, until the liquid is reduced in half, and more saucy than brothy. When the chicken is cool enough to handle, shred the meat into bite-size pieces. Return chicken to the pot and simmer until it is heated through. Remove the whole spices before serving.
To make the tacos, first warm the tortillas. You can fry them in oil if you like, following the package instructions, or wrap half of them in a paper towel and cook them for 40 seconds in the microwave (the tortillas seem to warm better in smaller quantities, plus your second — and third — tacos will be just as hot as the first if you warm them in batches). For each taco, spoon some of the chicken filling into the tortilla, top with grated cheese, cilantro, and shredded lettuce, and sour cream if you wish.
Friday, November 16, 2007
Taste & Create 3: Spanish Churros
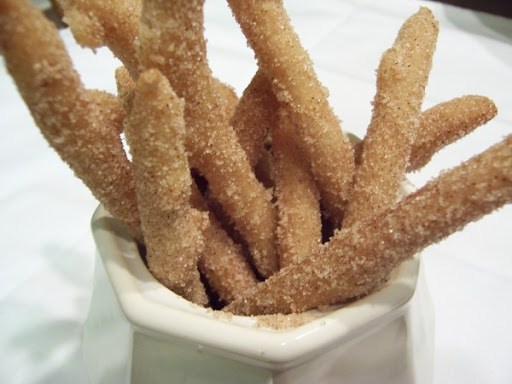 Are those churro fries? What? Let me explain!
Taste & Create, started by Nicole at For the Love of Food, is a great way for bloggers to interact. Sure, we read each other's work, and we often try out someone else's creations... but this event is specifically designed for that purpose. Participating bloggers are paired together and they make a dish from the other's blog. Sounds fun, right?
I was paired with the delightful Kelly at Sass & Veracity! Woowoo!! I have enjoyed her blog for as long as I've been reading food blogs, and it was a joy to rifle through her archives!
Scrolling through all her tasty entries... I kept coming back to one - her churros. Dave and I are completely smitten with churros. I'll admit, the ones we are in love with happen to come from Costco... for a dollar... but still. Sweet and crunch and tender.... and only a dollar??!?! I'll take it! Add to it that the ingredient list and directions are short and sweet, and you're looking at the perfect dessert (or snack!)
Now, this is where the trouble begins. Kelly's recipe calls for a pastry bag and a star piping tip. I thought, "I have that cake decorating kit... that should be ok..." Ha! I happily stirred my dough, let it cool a tiny bit, and then jammed it into my eeny-weeny icing bag. If you can imagine that, you can probably also imagine the eeny-weeny tip on it, too... maybe 3/16ths of an inch (and she called for a tip twice that size!!!) I have no idea what I was thinking. The dough is far to thick for such a small tip... the squeezing involved to get my thin little lengths of dough into the oil... yikes.
However, all was not lost. I managed my way through getting the tasty little churro-fries fried, drained, and rolled in cinnamon-sugar. All the work was worth it once we were able to nibble on them - and their sheer cuteness STILL has me smiling!
I will totally make these again - but not until I get a bigger tip! :)
My thanks goes out to Nicole for creating this fun exchange and to Kelly for her delicious blog!
Spanish Churros
c/o Kelly @ Sass & Veracity
http://sassandveracity.typepad.com/sass_veracity/2007/08/spanish-churros.html
1-1/2 tsp mild olive oil
1/4 tsp kosher or sea salt
1 cup unbleached flour
Oil for frying
granulated sugar for dusting
To make the churros, bring 1 cup water, the oil, and the salt to a boil in a saucepan. Add the flour all at once and stir vigorously with a wooden spoon until a smooth ball forms. Lower the heat and cook, flattening and turning the dough for 2 minutes. Cool and transfer to a pastry bag equipped with a 3/8-inch star tip (the fluted edge is essential).
Pour the oil to a depth of at least 1 inch in a skillet (or better still, use a deep-fryer heated to 360 degrees) and heat until the oil quickly browns a cube of bread. Squeeze 5-inch lengths of dough through the pastry tube into the oil -- as many as will comfortably fit.
Reduce the heat to medium-hot and fry until the churros puff and have barely begun to turn golden, about 20 seconds. Do not overcook -- the churros should be crunchy outside and still soft within.
Drain on paper towels. Dredge them in sugar while they're warm.


 Posts
Posts

