Tuesday, November 27, 2007

Tender is the Daring Baker

Look at me. Only my second month in the Daring Bakers, and already I'm a day late!! I feel terrible about it, but I simply couldn't fit it in yesterday (first day at the new job followed by a hockey game led to a really late night). I know, I know, I totally should have written it up early, and that's what I'll do going forward... I honestly meant to on Sunday... but then was one with the couch in an amazing bout of mopiness... From this day on, I will be a better DB! (Especially considering how badly I wanted to be a part of this marvelous group!!) This go around, the lovely Tanna chose for us a Tender Potato Bread. I don't know about you, but I LOVE potato bread! I was so happy to tackle this challenge!!


Now, I'm no bread maker. I'm frightened of yeast. I try to hide my feelings from the yeast, but its like a dog.. or a bear... or those scary jumping spiders... it smells my fear. However, being a Daring Baker means fighting that fear, forging on, taking charge, trying something new. So I took my potatoes and got a move on. [Some advanced warning... I followed the recipe plainly. I have comfortable-ness issues tweaking unfamiliar recipes until I've made them a couple of times... so I def. plan to try this again, but sassed up.]


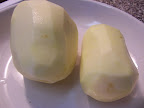
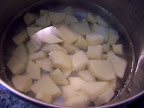
Plain, peeled and diced.


I don't have a food scale... this recipe called for between 8 and 16 ounces of potato... I kinda went with it, figuring that I'd know when to stop with the flour. For the most part, I think that worked out ok for me.


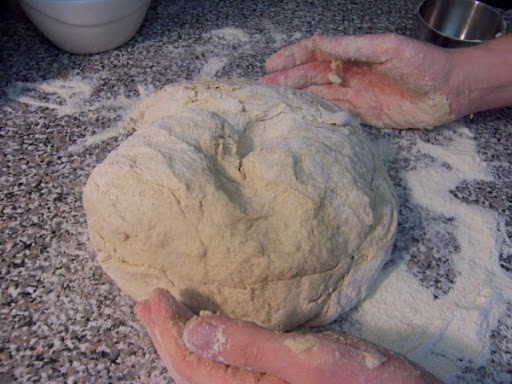
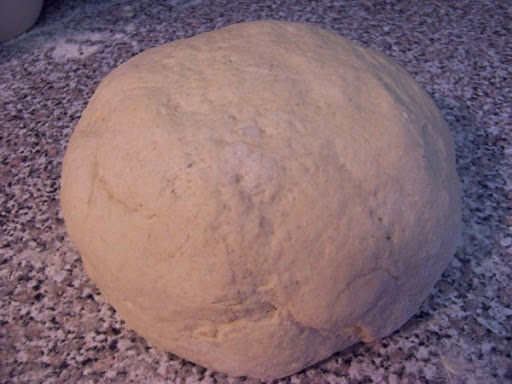
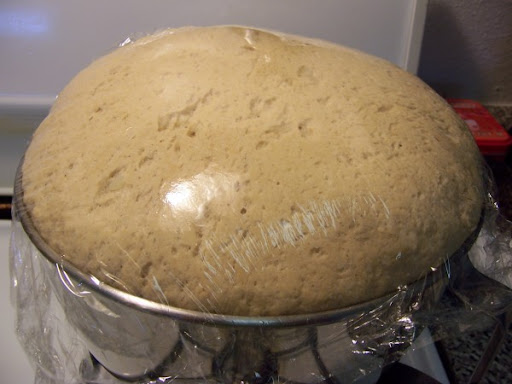
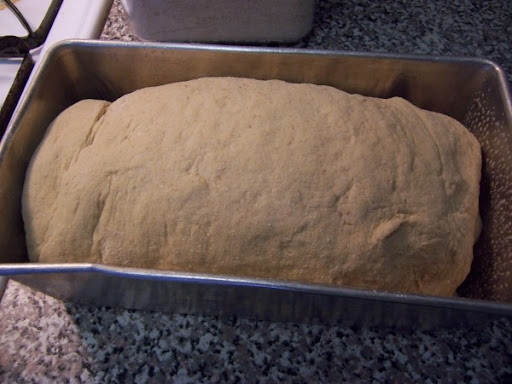
Boy, was this dough sticky!!! Sticky and TOTALLY FUN!!!! I always use my stand mixer to knead in dough, so the actual process of kneading by hand was a new experience for me. Yah, you'll read about hour therapeutic it can be... how relaxing... and while you might think its weird or bunk... it isn't. (unless, of course, you have hand/arm problems, and then I can see it being much more of a chore.) I worked about 8 cups of the flour called for and it came together in a nice, elastic dough. (And as you can see, my rise was big and poofy!!


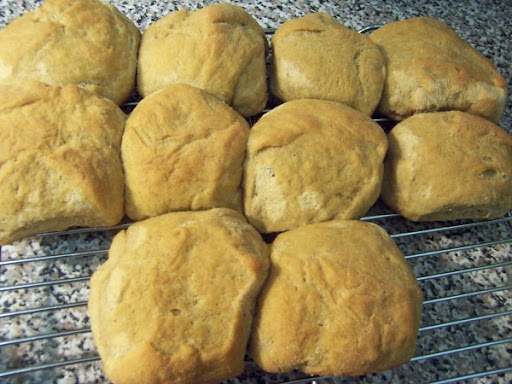
I don't think I took shots of my loaf and rolls after the second rise. The rolls came out funny-looking... I think I either fiddled with them too much getting them into roll-shapes, or they didn't rise enough.

The bread was thick and chewy yet nicely soft and tender. I don't have enough experience with breadmaking to be able to tell you how this is possible... chewy yet tender... but it defies science. Defied-Science that tasted great slathered with ham salad! :)


Please head on over to Tanna's site, My Kitchen in Half Cups, for the delicious and satisfying recipe. To see almost 400 other versions of this bread (because mine is certainly way less interesting than theirs!!), head on over to the Daring Baker Blogroll!!

(and again, my apologies for being Ms. Late-ypants!!)

See the recipe...


Sunday, November 18, 2007

Chipotle Chicken Tacos

This might not be the best photo in the world... You're lucky you have a photo at all, actually. I'd piled my toppings on these babies and was headed out the door when the little quiet voice in my head said, "Take a picture, fool!!"... so I tried to push some of the lettuce and cilantro out of the way so you could see the actual filling... O well. Just trust me that there is some tasty chicken, pepper jack cheese and sour cream under all that greenery.

Photo snapped, I proceeded to join the hubs in front of the tv (football was on!!!). I took a bite, looked at him and said, "Dif if dewifuff!!!!" (yes, Mom, my mouth was full.) Seriously dewifuff.

The filling was nice and spicy, but the cool, creamy sour cream cut it so that it was the right amount of hot. (Meaning, it didn't make me cry this time!) Now, I did mess with it a little. (Big surprise.) Rather than add the can of diced tomatoes, I used an already-opened jar of salsa. Same difference, I thought. The salsa was "chipotle" flavored, so I kept to the theme. My suggestion to you would be: Use tomatoes if you have them or if you want milder tacos, but feel free to use whatever salsa you have on hand or like. My other suggestion: Make sure you get quality corn tortillas. Ours split down the middle, leading to rather messy eating.

I cannot fully express my love for these tacos. They were the absolute perfect meal for us last night. It was cold outside and in and I was in one of those Pajama Sunday kind of moods. You cannot go wrong with this recipe.


Chipotle Chicken Tacos
c/o Culinate
http://www.culinate.com/search/q,vt=top,q=chipotle+chicken+tacos/2188

For the chicken
2 Tbsp. canola or olive oil
1 small onion, finely chopped
2 cloves of garlic, crushed
¾ tsp. dried oregano, freshly crumbled
¼ tsp. freshly ground black pepper
1 cup chicken broth
1 (14½ oz.) can whole tomatoes, chopped, with juice
1 lb. boneless, skinless chicken thighs (or breasts if you prefer)
1 to 2 chipotle peppers canned in adobo sauce, finely chopped
1 cinnamon stick
1 whole piece of star anise
Salt to taste

For the tacos
8 to 12 corn tortillas
1 cup grated jack cheese
1 cup fresh cilantro, washed, dried and destemmed
1 cup romaine lettuce, washed, dried and cut into shreds
Sour cream (optional

In a large saucepan over medium heat, heat the oil. Add onion, garlic, oregano, and pepper. Cook until the onion begins to soften and turn brown on the edges; add the stock, the juice from the tomatoes, and the chicken.

Bring to a simmer, cover, and cook until the chicken is cooked through, about 10 minutes. Remove the chicken from the pan and set aside to cool.

Add chopped tomatoes, chipotle peppers, cinnamon, and star anise to the pot, and simmer 15-20 minutes, until the liquid is reduced in half, and more saucy than brothy. When the chicken is cool enough to handle, shred the meat into bite-size pieces. Return chicken to the pot and simmer until it is heated through. Remove the whole spices before serving.

To make the tacos, first warm the tortillas. You can fry them in oil if you like, following the package instructions, or wrap half of them in a paper towel and cook them for 40 seconds in the microwave (the tortillas seem to warm better in smaller quantities, plus your second — and third — tacos will be just as hot as the first if you warm them in batches). For each taco, spoon some of the chicken filling into the tortilla, top with grated cheese, cilantro, and shredded lettuce, and sour cream if you wish.

See the recipe...


Friday, November 16, 2007

Taste & Create 3: Spanish Churros

Are those churro fries? What? Let me explain!

Taste & Create, started by Nicole at For the Love of Food, is a great way for bloggers to interact. Sure, we read each other's work, and we often try out someone else's creations... but this event is specifically designed for that purpose. Participating bloggers are paired together and they make a dish from the other's blog. Sounds fun, right?

I was paired with the delightful Kelly at Sass & Veracity! Woowoo!! I have enjoyed her blog for as long as I've been reading food blogs, and it was a joy to rifle through her archives!

Scrolling through all her tasty entries... I kept coming back to one - her churros. Dave and I are completely smitten with churros. I'll admit, the ones we are in love with happen to come from Costco... for a dollar... but still. Sweet and crunch and tender.... and only a dollar??!?! I'll take it! Add to it that the ingredient list and directions are short and sweet, and you're looking at the perfect dessert (or snack!)

Now, this is where the trouble begins. Kelly's recipe calls for a pastry bag and a star piping tip. I thought, "I have that cake decorating kit... that should be ok..." Ha! I happily stirred my dough, let it cool a tiny bit, and then jammed it into my eeny-weeny icing bag. If you can imagine that, you can probably also imagine the eeny-weeny tip on it, too... maybe 3/16ths of an inch (and she called for a tip twice that size!!!) I have no idea what I was thinking. The dough is far to thick for such a small tip... the squeezing involved to get my thin little lengths of dough into the oil... yikes.

However, all was not lost. I managed my way through getting the tasty little churro-fries fried, drained, and rolled in cinnamon-sugar. All the work was worth it once we were able to nibble on them - and their sheer cuteness STILL has me smiling!

I will totally make these again - but not until I get a bigger tip! :)

My thanks goes out to Nicole for creating this fun exchange and to Kelly for her delicious blog!


Spanish Churros
c/o Kelly @ Sass & Veracity
http://sassandveracity.typepad.com/sass_veracity/2007/08/spanish-churros.html

1-1/2 tsp mild olive oil
1/4 tsp kosher or sea salt
1 cup unbleached flour
Oil for frying
granulated sugar for dusting

To make the churros, bring 1 cup water, the oil, and the salt to a boil in a saucepan. Add the flour all at once and stir vigorously with a wooden spoon until a smooth ball forms. Lower the heat and cook, flattening and turning the dough for 2 minutes. Cool and transfer to a pastry bag equipped with a 3/8-inch star tip (the fluted edge is essential).

Pour the oil to a depth of at least 1 inch in a skillet (or better still, use a deep-fryer heated to 360 degrees) and heat until the oil quickly browns a cube of bread. Squeeze 5-inch lengths of dough through the pastry tube into the oil -- as many as will comfortably fit.

Reduce the heat to medium-hot and fry until the churros puff and have barely begun to turn golden, about 20 seconds. Do not overcook -- the churros should be crunchy outside and still soft within.

Drain on paper towels. Dredge them in sugar while they're warm.

See the recipe...


Thursday, November 15, 2007

Orzo with Chicken, Corn, and Green Beans

This meal might not look like much, but it was soooooo yummy. And amusing. Why? Because it says it serves 4. Make it as made, and you'll end up with a large bucket of the stuff... so... while it may feed four, it serves them more than once. Dave and I had tons of it, and then we each had it for lunch the next day, and then I think we had it again for dinner...

I almost think of it as being akin lemonade... we could make a batch of this, and then set up a stand on the side of the road... Pasta with Chicken and Veg, $1!!! We'd be rich. RICH!

Psst! Head on over to Ruth's Once Upon a Feast for more tasty pasta dishes!! She has a terrific weekly roundup of everything pasta - which is just what you need in this cold cold weather!


Orzo with Chicken, Corn and Green Beans
Everyday Food Magazine, May 2005
http://www.marthastewart.com/portal/site/mslo/menuitem.fc77a0dbc44dd1611e3bf410b5900aa0/?vgnextoid=ce9ecf06cd80f010VgnVCM1000003d370a0aRCRD&autonomy_kw=orzo%20with%20chicken%20corn%20and%20green%20beans&rsc=ns2006_m1

Coarse salt and ground pepper
1/2 pound orzo
8 ounces green beans, trimmed and cut into 1-inch pieces
1 tablespoon olive oil
4 garlic cloves, minced
1 package (10 ounces) frozen corn kernels, thawed
1 whole roasted chicken, (3 pounds), skin discarded, shredded (about 3 1/2 cups)

In a large pot of boiling salted water, cook orzo until al dente, according to package instructions; add green beans during last 6 minutes of cooking. Drain; rinse under cold water until cooled.

Meanwhile, in a large nonstick skillet, heat oil over medium heat. Add garlic; cook until fragrant, 1 to 2 minutes. Add corn and 1 teaspoon salt; cook until warmed through, 2 to 3 minutes.

Toss pasta and green beans with corn mixture and chicken. Season generously with salt and pepper.

Serves 4.

See the recipe...


Monday, November 12, 2007

Butternut Dumplings with Brown Butter and Sage

I feel all out of sorts. As though I've stepped out of time, really. I mean, how how how has it gotten to be mid-November already? What is this craziness? I honestly don't know where the time has gone. I hope that some of this changes after Thanksgiving, when I start my NEW JOB(!!!), because not only are the hours a little better, but my daily commute will consist of a walk across the street. In addition to the regained time, I hope to get a little sanity and happiness back.... both of which are necessary, I think, for a more present life. More present, more awareness of time, more blogging. I am counting the days.

Something you will have to forgive me for in the meantime is the disconnection of my entries to when they actually happened. I'd cook, I'd photograph, I'd even enter the recipe and picture into blogger... and then I'd walk away from the computer. I have our anniversary cakes from the end of October, I have Dave's birthday dinner and cake from early November, I have... maybe 28 other entries from day-to-day life just piled up... so... yah. Lots to post about... but the timing will be all off. I want to share everything with you, and catch up, because Lord knows, I'll still be cooking... ]

Now, I don't remember exactly when this dinner happened... maybe three weeks ago? I made the dumplings on a Sunday afternoon during football... or it could have been while Hubs was off at the hockey game... either way, it happened during sports. :) This was my second go at the dumplings.. I'd tried them last winter, and they were miserably bad. It was before I got a handle on how to do gnocchi/dumplings and added waaaaaay to much flour... blech! This time around, I knew what consistency to look for, I knew when to stop messing with it.

The squash and potatoes meld beautifully together. Oooh, and the brown butter sauce? Divine! What I really enjoyed about this was how warm and satisfying it was. It's finally cold outside, and these dumplings are creamy and soothing and super-yummy.

And whats better, is it makes bags and bags of dumplings, so our freezer is two bags fuller!! So on nights I don't feel like going to the trouble of putting something new together, and I don't want take-out, I can just pop them into some boiling water and we have dinner! Sweet!


Butternut Dumplings with Brown Butter and Sage
c/o Alton Brown, Food Network Channel
http://www.foodnetwork.com/food/recipes/recipe/0,1977,FOOD_9936_17864,00.html

1 1/2 small butternut squash, halved and seeded
4 medium baking (russet) potatoes, pierced
1 egg
11/2 tablespoons kosher salt
1 pinch nutmeg
11/2 cups all-purpose flour, plus additional, for dusting
Oil
1 bunch sage, leaves chiffonade
8 tablespoons unsalted butter
1/2 cup grated Parmesan

Preheat oven to 375 degrees F.

On a sheet pan, place the squash flesh side down and roast until very tender (about 45 minutes). At the same time, bake potatoes directly on the rack of oven for 1 hour.

Split the potatoes and allow to cool slightly, or until you can handle them. Don't let them cool completely. Scoop the flesh of the potatoes and the squash into a bowl and mash with a hand masher. Mix in the egg, salt and nutmeg. Then add the flour and mix until a soft dough forms. Do not do this in a mixer, it will overwork the dough. Add flour by the spoonful if it's still too moist.

Turn out onto a floured board and divide into 8 portions. Roll out into ropes and cut into 1/2-inch pieces. Line the pieces up on a floured sheet pan as you work. At this point you could freeze them on the pan until solid, then transfer to zip top bags and store in the freezer.

In a large pot of boiling, salted water gently drop in the dumplings. Don't overcrowd. As they begin to float, remove them with a slotted spoon and toss them into an ice bath.

Drain off the water and toss in a little oil. Store loosely in containers until ready to use.

To reheat, in a saute pan over high heat add 1 tablespoon of soft butter. Cook until the butter begins to foam and turn brown. Add 2 teaspoons sage leaves and 1 cup of dumplings. Cook for an additional minute until the dumplings are heated through. Repeat until you have desired amount of servings. Plate and top with freshly grated Parmesan.


See the recipe...


Wednesday, November 7, 2007

Eco-shopping Tip


I don't normally do this, but this deal is almost too good to be true!!

I just love my Envirosax's. I keep one in my purse for shopping "emergencies," I tote things to work in it, I take it with me to the farmer's market on weekends... They are super sturdy and can hold a TON of stuff!!!

If you are in the market for some re-usable shopping bags (and produce bags and a water bottle), check out the deal at Delight.

(No, I'm not affiliated with them, I just really really like my bags and think everyone should have them. Earth friendly AND stylish!)

See the recipe...