Sunday, June 29, 2008

Daring Bakers June: Success with Yeast (Finally!!)


My word. I knew if the Daring Bakers pushed long enough, I would make friends with yeast. (At least, I'd hoped so.) My comfort level rose a bit with this pizza dough (especially since I've made it half a dozen times since), so I went into this challenge confident... at least as far as the yeast was concerned.


I'll be honest, when Kelly and Ben announced this Danish braid, I did shiver in my flip-flops. Laminated dough? Fold and turn, what? O dear. I felt like the potential for disaster was strong. However. This is clearly something I've never done before - and something I've always wanted to try... what better opportunity than with the Daring Bakers? With such a level of support, I knew it would be fun.


The month of June really got away from me. Middle of last week it finally sank in that I HAD to get this challenge done! I did a quick search for fillings and decided on this hybrid of cream cheese/peach filling, and then a second easy one - nutella and chocolate. So Saturday night, I made the dough, chilled it, added the butter and performed all the turns, setting the dough up for a relaxing nap in the fridge overnight.


I wish you could have been there, during all that rolling out. I wanted to make sure it was the right size, so I pulled out my trusty tape measure. Imagine a kitchen in disarray, flour coating most surfaces, sprinkled on the cat, a girl feverishly rolling... only to grab her dusty industrial tape measure and mutter to herself... ah, good times. I even used it for the flap creation... I know, I know, I have a problem. :)


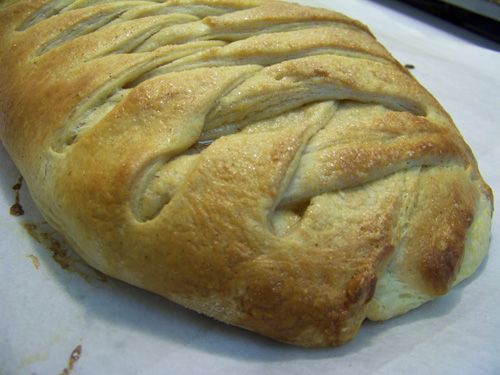
Flapped, filled and folded, my babies got their proof on - and you know what? They actually rose! Hurray! This is usually the part in the story when I have to admit that my yeast defeated me... but not this time! Friendship has been forged! Awesome! Two and a half hours of resting and I popped the braid and little danish rolls into the oven.

Let me tell you, if I could bottle how wonderful my apartment smelled while the danishes baked... Not only would I be like this chick, but I could make a small fortune in sales. Sweet, slightly fruity, warm and cozy... that was my apartment yesterday morning. Before my first bite, I was completely in love with the danishes. While neither Dave nor I could place why, the flavor was familiar to us - the spices involved (cinnamon, nutmeg, cardamom, orange and lemon zest) were heavily reminiscent of Fall, but didn't seem out of place. I don't make coffee at home anymore, but I can't wait to have a slice with my morning tea!!

These Daring Bakers are amazing people. I have learned so much month-to-month and made so many new friends... I can't imagine food blogging any other way! To see this wonderful group in action, check out the other Daring Bakers' wonderful creations!


Daring Bakers June: DANISH DOUGH

Makes 2-1/2 pounds dough

Ingredients
For the dough (Detrempe)
1 ounce fresh yeast or 1 tablespoon active dry yeast
1/2 cup whole milk
1/3 cup sugar
Zest of 1 orange, finely grated
3/4 teaspoon ground cardamom
1-1/2 teaspoons vanilla extract
1/2 vanilla bean, split and scraped
2 large eggs, chilled
1/4 cup fresh orange juice
3-1/4 cups all-purpose flour
1 teaspoon salt

For the butter block (Beurrage)
1/2 pound (2 sticks) cold unsalted butter
1/4 cup all-purpose flour

DOUGH
Combine yeast and milk in the bowl of a mixer fitted with the paddle attachment and mix on low speed. Slowly add sugar, orange zest, cardamom, vanilla extract, vanilla seeds, eggs, and orange juice. Mix well. Change to the dough hook and add the salt with the flour, 1 cup at a time, increasing speed to medium as the flour is incorporated. Knead the dough for about 5 minutes, or until smooth. You may need to add a little more flour if it is sticky. Transfer dough to a lightly floured baking sheet and cover with plastic wrap. Refrigerate for 30 minutes.

Without a standing mixer: Combine yeast and milk in a bowl with a hand mixer on low speed or a whisk. Add sugar, orange zest, cardamom, vanilla extract, vanilla seeds, eggs, and orange juice and mix well. Sift flour and salt on your working surface and make a fountain. Make sure that the “walls” of your fountain are thick and even. Pour the liquid in the middle of the fountain. With your fingertips, mix the liquid and the flour starting from the middle of the fountain, slowly working towards the edges. When the ingredients have been incorporated start kneading the dough with the heel of your hands until it becomes smooth and easy to work with, around 5 to 7 minutes. You might need to add more flour if the dough is sticky.

BUTTER BLOCK
1. Combine butter and flour in the bowl of a mixer fitted with a paddle attachment and beat on medium speed for 1 minute. Scrape down the sides of the bowl and the paddle and then beat for 1 minute more, or until smooth and lump free. Set aside at room temperature.

2. After the detrempe has chilled 30 minutes, turn it out onto a lightly floured surface. Roll the dough into a rectangle approximately 18 x 13 inches and ¼ inch thick. The dough may be sticky, so keep dusting it lightly with flour. Spread the butter evenly over the center and right thirds of the dough. Fold the left edge of the detrempe to the right, covering half of the butter. Fold the right third of the rectangle over the center third. The first turn has now been completed. Mark the dough by poking it with your finger to keep track of your turns, or use a sticky and keep a tally. Place the dough on a baking sheet, wrap it in plastic wrap, and refrigerate for 30 minutes.

3. Place the dough lengthwise on a floured work surface. The open ends should be to your right and left. Roll the dough into another approximately 13 x 18 inch, ¼-inch-thick rectangle. Again, fold the left third of the rectangle over the center third and the right third over the center third. No additional butter will be added as it is already in the dough. The second turn has now been completed. Refrigerate the dough for 30 minutes.

4. Roll out, turn, and refrigerate the dough two more times, for a total of four single turns. Make sure you are keeping track of your turns. Refrigerate the dough after the final turn for at least 5 hours or overnight. The Danish dough is now ready to be used. If you will not be using the dough within 24 hours, freeze it. To do this, roll the dough out to about 1 inch in thickness, wrap tightly in plastic wrap, and freeze. Defrost the dough slowly in the refrigerator for easiest handling.

Danish dough will keep in the freezer for up to 1 month.

Peach and Cream Cheese Filling
c/o:
http://www.epicurious.com/recipes/food/views/BLUEBERRY-CHEESE-DANISH-PASTRIES-10540
http://www.recipegoldmine.com/breakpastry/cream-cheese-croissants-strata.html

16 ounces cream cheese, softened
½ cup granulated sugar
2 large egg yolk
2 teaspoon vanilla
½ teaspoon salt
4 teaspoons freshly grated orange zest
2 teaspoon freshly grated lemon zest
4 tablespoons all-purpose flour

2 or 3 ripe fresh peaches, peeled
1 cup granulated sugar, divided
1/2 teaspoon nutmeg
1/2 teaspoon cinnamon

In a bowl beat together the cream cheese, the sugar, the yolk, the vanilla, the salt, the zests, and the flour until the mixture is smooth and chill the filling, covered, for at least 1 hour and up to 24 hours.

Slice peaches into a large bowl and sprinkle with a mixture of 1/2 cup sugar, nutmeg and cinnamon. Set aside.


DANISH BRAID
Makes enough for 2 large braids

Ingredients
1 recipe Danish Dough (see below)
2 cups filling, jam, or preserves (see below)

For the egg wash: 1 large egg, plus 1 large egg yolk

1. Line a baking sheet with a silicone mat or parchment paper. On a lightly floured surface, roll the Danish Dough into a 15 x 20-inch rectangle, ¼ inch thick. If the dough seems elastic and shrinks back when rolled, let it rest for a few minutes, then roll again. Place the dough on the baking sheet.

2. Along one long side of the pastry make parallel, 5-inch-long cuts with a knife or rolling pastry wheel, each about 1 inch apart. Repeat on the opposite side, making sure to line up the cuts with those you’ve already made.

3. Spoon the filling you’ve chosen to fill your braid down the center of the rectangle. Starting with the top and bottom “flaps”, fold the top flap down over the filling to cover. Next, fold the bottom “flap” up to cover filling. This helps keep the braid neat and helps to hold in the filling. Now begin folding the cut side strips of dough over the filling, alternating first left, then right, left, right, until finished. Trim any excess dough and tuck in the ends.

Egg Wash
Whisk together the whole egg and yolk in a bowl and with a pastry brush, lightly coat the braid.

Proofing and Baking
1. Spray cooking oil (Pam…) onto a piece of plastic wrap, and place over the braid. Proof at room temperature or, if possible, in a controlled 90 degree F environment for about 2 hours, or until doubled in volume and light to the touch.

2. Near the end of proofing, preheat oven to 400 degrees F. Position a rack in the center of the oven.

3. Bake for 10 minutes, then rotate the pan so that the side of the braid previously in the back of the oven is now in the front. Lower the oven temperature to 350 degrees F, and bake about 15-20 minutes more, or until golden brown. Cool and serve the braid either still warm from the oven or at room temperature. The cooled braid can be wrapped airtight and stored in the refrigerator for up to 2 days, or freeze for 1 month.

See the recipe...


Tuesday, June 24, 2008

Poached Eggs with Arugula and Polenta Fingers

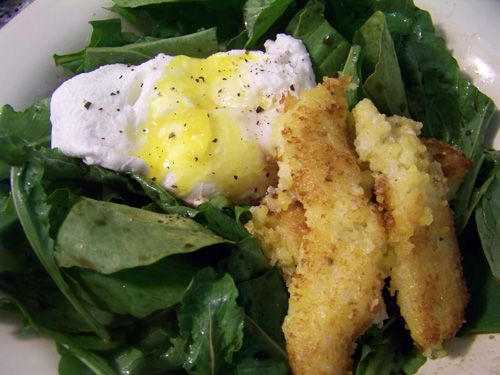
Never been as angry at a dish as I was at this one. (I mean, as angry as you can get making dinner, I guess.) Either I don't know what I'm doing with polenta, or instructions to fry polenta are mean and evil. Polenta explodes... all those little bits of corn pop pop pop in the hot oil, causing much cussing and consternation. I had a dish towel covering the arm of my spatula hand, and a piece of aluminum foil in my other hand as a shield for the rest of me. Add the danger to the fact that the polenta rectangles don't stay in one piece, rendering themselves unpretty plate additions... bah. Hateful.

Other than that, I was pretty happy with dinner. The poached egg oozed dreamily over the lightly-dressed arugula and the polenta blobs provided nice texture and heft. Speaking of the polenta, this was the first time I'd made it with coconut milk and I was pleasantly surprised at how much I liked it. The coconut flavor was a nice twist - I wouldn't do it all the time, but it made for a nice change.

So. If you have an outfit made of silicone and gloves on, make this tasty salad for yourself!


Poached Eggs with Arugula and Polenta Fingers
c/o Bon Appetit Magazine, May 2008

From Oliver Maindroult of Urbane.

1 13.5 to 14 ounce can unsweetened coconut milk
½ cup water
½ cup polenta (coarse cornmeal)
1 tablespoon freshly grated Parmesan cheese
2 ½ tablespoons olive oil, divided
1 teaspoon coarse kosher salt
1 teaspoon white wine vinegar
4 large eggs
2 cups arugula
1 teaspoon balsamic vinegar
Fleur de sel

Butter 13x9x2-ince baking pan. Bring coconut milk and ½ water to a boil in heavy medium saucepan. Gradually whisk in polenta; reduce heat and simmer until polenta is very thick and tender, about 7 minutes. Mix in cheese. Pour polenta into half of pan; spread to form 9x6-inch rectangle. Press plastic wrap onto surface of polenta and chill until firm, about 1 hour. DO AHEAD: Can be made 1 day ahead. Keep refrigerated.

Preheat oven to 300°F. Turn polenta out onto cutting board. Cut into 3x1 –inch rectangles. Heat 2 tablespoons oil in large nonstick skillet over high heat. Working in batches, add polenta fingers; cook until golden, about 2 minutes per side. Transfer to baking sheet; keep warm in oven.

Add enough water to large skillet to reach depth of 2 inches; bring to simmer. Mix in 1 teaspoon coarse salt and white wine vinegar. Crack each egg into separate custard cup. Slide eggs into water and cook until whites are set but centers are still runny, about 3 minutes.

Meanwhile, toss arugula with ½ tablespoon oil and balsamic vinegar in medium bowl; divide among 4 plates.

Top each salad with poached egg. Break yolks with tip of knife. Sprinkle with fleur de sel. Serve with polenta.

See the recipe...


Thursday, June 19, 2008

Turkey and Pork Meatballs with Orecchiette Pasta and Spinach-Almond Pesto

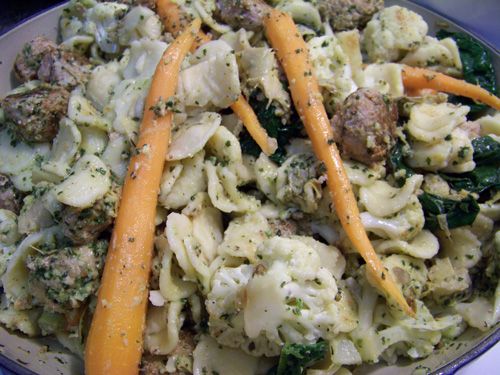
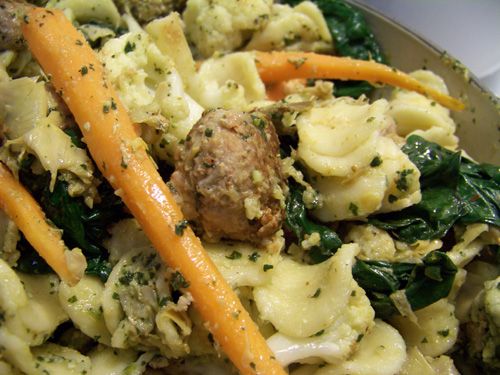
I know this pasta dish looks completely ridiculous. I was in something of hunger-induced hurry to get to the eating part of the evening, and I didn't take the time I should have to photograph what ended up being a wonderful meal.

Dave and I had my lovely new friend Jessi over for dinner a few weeks ago, and if you've been reading my blog for a while, you know that means we had to eat something both New and Interesting. I'd recently brought the Top Chef cookbook home, and Dave promptly picked this recipe. (You can see the second recipe chosen from this book here.)

I am lucky to work across the street from where I live, so I popped home at lunch to mix the meatballs and ball them and make the pesto. I like getting as much as possible done before we have company, makes for easier chatting and whatnot.

The meatballs came together perfectly well. I always find it funny when making balls of things. You try to make them uniform, and you think you are, until you're done and you can see the ball progression.... little by little, they all get bigger and bigger. This leads me to....

Holy Garlic Whoa. Did you see how much garlic is in the pesto? Whoa 12 garlics, whoa. It wasn't too much flavor-wise (at least, I didn't think so), so don't let it scare you. Honestly, you only use enough pesto to coat, and that small amount needs to do the job of flavoring the vegetables and pasta - so it should be strong. But man, 12 garlics is scary. I don't know why we planned to serve our guest so many garlics her first night over, but she's still nice to me, so I guess I'm safe.

I will tell you that the recipe lies. Yes, it was on Top Chef, and they have time limits and all that, but its still television - and television is often fibbing. The mass of vegetables need more than 5 minutes to cook. Maybe more like 20. And while the big carrots are charming, their bigness makes it really difficult to stir the vegetables around with the pasta and meatballs. Just my two cents - these two grievances are easily manageable and don't detract much from the overall experience.

And that overall experience? Very good. This was a nice, wholesome dish. The possible heaviness of the pasta and vegetables is easily brightened by the pesto. The pasta, in fact, provided a nice bite as compared to the vegetables. Lots of steps, sure, but uncomplicated ones, and well worth it.

I am excited to be able to share this pasta with Ruth of Once Upon A Feast. She is the creater of Presto Pasta Nights (check out its new home!!) and one of the nicest people in the blogosphere. She is hosting PPN this week, so make sure to look for her round-up tomorrow!


Turkey and Pork Meatballs with Orecchiette Pasta and Spinach-Almond Pesto
c/o Top Chef: The Cookbook
recipe by Casey and Dale, Season 3, Episode 6

Turkey and pork meatballs:
½ pound ground turkey
½ pound ground pork
1 garlic clove, minced
¼ cup grated Parmesan cheese
1 tablespoon all-purpose flour
1 tablespoon minced onion
1 tablespoon minced fresh flat-leaf parsley
1 tablespoon minced fresh oregano
1 teaspoon lemon zest
2 tablespoons white wine
1 large egg, lightly beaten
½ teaspoon red pepper chile flakes
½ teaspoon salt
2 tablespoons olive oil, plus more as needed

Vegetables and pasta:
2 tablespoons extra-virgin olive oil
4 cups cauliflower florets
1 cup baby carrots
One 14-ounce jar artichoke hearts, each cut in half
1 packed cup fresh spinach leaves
1 tablespoon white wine
Salt and freshly ground black pepper
1 pound orecchiette pasta, cooked al dente

Spinach-Almond Pesto, recipe follows

For the meatballs:
In a large bowl, stir together all the meatball ingredients except the oil and form into meatballs about ¾ inch in diameter.

In a large skillet, heat 2 tablespoons oil over medium-high heat until hot but not smoking and cook the meatballs, in batches, turning them as they cook, until browned and cooked through, about 5 minutes. Add more oil to the skillet with new batches as necessary. With a slotted spoon, transfer to a wire rack to drain. Set aside.

For the vegetables and pasta:
In a large sauté pan or skillet, heat the oil over medium heat. Add the cauliflower, carrots, and artichokes and sauté until softened but al dente, about 5 minutes.

Add the spinach and cook for 1 minute, or until just wilted. Add the wine and cook until evaporated. Season lightly with salt and pepper.

Add the orecchiette and meatballs to the vegetables and stir to combine. Add enough pesto to coat, then heat to warm through. Taste and add salt and pepper if necessary. Serve immediately.


Spinach-Almond Pesto
10 garlic cloves, peeled and left whole, plus 2 garlic cloves, minced
½ cup extra-virgin olive oil, plus more as needed
½ cup sliced almonds, toasted
4 ounces fresh spinach, plus more as needed
½ cup grated Parmesan cheese, plus more as needed
3 tablespoons fresh lemon juice, plus more as needed
2 tablespoons white wine
Salt and freshly ground black pepper

In a medium saucepan, bring the whole garlic and oil to a bare simmer over low heat and poach until softened and lightly golden, about 15 minutes. Remove from the heat and cool.

Combine the cooked garlic along with its cooking oil in a food processor. Add the minced raw garlic, the almonds, spinach, cheese, lemon juice, wine and salt and pepper to taste and puree. Taste and adjust the seasonings as needed. Set aside until you’re ready to assemble the dish.

See the recipe...


Tuesday, June 17, 2008

Danish Pork Burgers

I haven't uploaded any photographs of dinner this last week (and there is one in particular I'd like to share, because it really ticked me off), but I was scrolling through my drafts for something to share. I cannot believe I haven't sung from the mountain-tops about these burgers yet. Let me do so now. Ahem.

Delicious but different. Knock-your-socks-off tasty. Warm and cozy. Easy to prepare. Easily one of my top five favorite burgers. Maybe even top three.

Elise over at Simply Recipes posted about these in February 2007. I don't know when I happened upon them, but I didn't make them until December... which, now that I think about it, is a damn shame. All those months this recipe was available to me and I overlooked it.

You may wonder to yourself, "Do I want a pork burger with saltines in it?" My answer is a resounding YES! The red onion and saltines impart a delicate... something... to the burger that is plain addicting. I can't explain it, but the combination is fantastic. I don't remember how many burgers I ended up with, but between Dave and I, we ate them all. Seriously. All of them in one night. It was crazy. (Which, in retrospect, makes me hope there weren't a lot of them!)

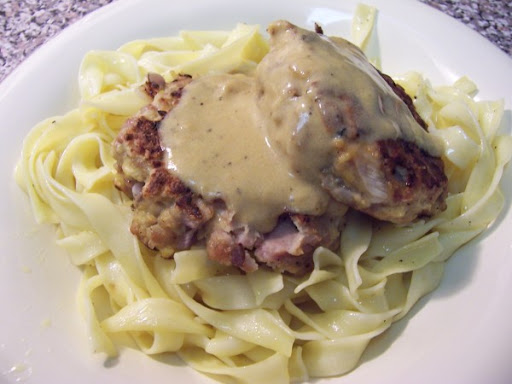
Now, I didn't serve these babies on a bun. It was the middle of winter and I was longing for egg noodles. Once the burgers were done, I poured a little chicken stock into the pan and scraped up the bits. To that I added the mustard, forming a little sauce to go over the burgers and noodles.

Now that it's burger season, I implore you to give these a try.


Danish Pork Burgers
c/o Elise at Simply Recipes
http://www.elise.com/recipes/archives/004289danish_pork_burgers.php

1 pound ground pork
1 red onion, finely diced
16 saltine crackers, crumbled
1/2 cup whole milk
2 eggs, lightly beaten
1 teaspoon kosher salt
1/2 teaspoon freshly ground black pepper
Vegetable oil for cooking
Dijon mustard for serving

Combine the pork, onion, saltines, milk, eggs, salt, and pepper in a large bowl. Use your hands to mix well together.

Lightly brush a large, nonstick skillet with vegetable oil. Heat on medium high heat. Divide the pork mixture into 8 equal portions. Working in batches, drop them from a spoon into the hot pan, spacing them evenly. Pat down with the back of a spoon to form into patties. Cook each patty, turning once, for 4 to 5 minutes per side, until golden brown.

Serve the burgers hot with a dollop of Dijon mustard.

Serves 4.

See the recipe...


Saturday, June 14, 2008

Creamy Quinoa with Dried Cranberries

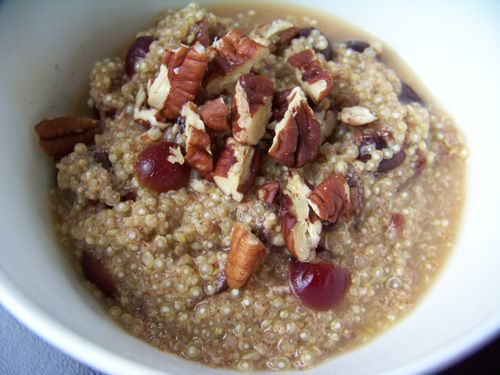
Caution: The breakfast above is hotter than it looks!!

I burnt the inside top of my mouth like nobodies business with my first bite. Admittedly, it was a bite while it was still in the pot, so it was my own silly fault. Take it from me, blow on it first. :)

Now, I didn't have maple sugar, so I used brown and a squirt of maple syrup. I also didn't have soy milk, so I used skim. (Between making it and having leftovers, though, I'd picked up some soy milk - and the leftovers were amazing with some poured on top.)

Earthy. Sweet. Wholesome = three words I use to describe this. "Tastes like camping" is what my husband said. I don't know what that means, but I hope it was a compliment. We are very much bacon and eggs for breakfast people, so this quinoa was a nice change. The dried cranberries plump up and the nuts are a nice contrast, both in flavor and texture. Maybe not the best choice for a summer breakfast, but believe you me, I'll be pulling this recipe out come Fall.


Creamy Quinoa with Dried Cranberries
c/o Vegetarian Times Magazine

Serves 4.

1 ½ cups vanilla soymilk, plus more for serving
¼ tsp. salt
1 cup quinoa, rinsed and drained
½ cup dried cranberries
2 Tbs. maple sugar
1 tsp. ground cinnamon
½ tsp. ground ginger
¼ tsp. ground allspice or cloves
¼ tsp. ground nutmeg
½ cup chopped pecans, toasted, for sprinkling

Bring soymilk, salt, and 1 cup water to a boil in a saucepan. Stir in quinoa and cranberries, and reduce heat to medium-low. Simmer 15 to 20 minutes, or until liquid is absorbed and grains are tender, stirring occasionally. Remove from heat, and stir in maple sugar, cinnamon, ginger, allspice, and nutmeg. Serve warm, topped with more soymilk and pecans.

Per 1-cup serving: 362 calories, 10 g protein, 15 g total fat, 50 g carbs, 0 mg cholesterol, 185 mg sodium, 6 g fiber, 17 g sugars

See the recipe...


Friday, June 13, 2008

Tilapia with Parmesan Crab Sauce

This will be a funny story, I promise. (Mildly amusing at the least.)

I saw this recipe on 28 Cooks a while back and bookmarked it. We've had frozen tilapia in the freezer (I don't know what possessed me to buy the bag of a million fillets) and this looked like an unusual yet delicious way to use them up. Not to mention, it is specifically mentioned that this recipe will garner compliments, and everyone needs those, right?

Now, as I mentioned, I had the tilapia in hand. In fact, I had all the ingredients I needed, save for the 8 ounces crab. This posed something of a dilemma. 8 ounces is a cup, a half-pound - really, not much. I went to two stores (three if you count checking while at Costco - but you shouldn't, because their products are bulky to begin with) in my search for a humble 8 ounce package of crab. In both places, 16 ounces was the smallest amount available. I wasn't up for finding something to do with the remainder (obviously, I was out of my mind), so I took this is a personal challenge.

While at Wegmans, I asked the clerk at the seafood counter if she could repackage a smaller portion for me. She said no. I stood there and looked sad. Still no. And then I asked the million dollar question:

"Um, well.... what's in your crab cakes?"

You see, each of the prepared crab cakes was 8 ounces. The perfect amount. She stated that they pride themselves on having each cake be 98% crab, minimal filler. While I don't necessarily agree with their 98%-ness, it was still more crab than not, and I rationalized that the filler itself would help the sauce thicken up. Sure, it would be weird and a little trashy to use a crab cake in lieu of normal crab, but I was desperate. All was not lost.

I prepared the sauce otherwise as written and it came together easily. I pulled the crab cake apart and added it to the sauce. Rather than just take it off and serve, I kept it on the heat for a minute or two, just to let the crab cake bits incorporate fully. The sauce was glorious and creamy and well worth the measures I had to take to make it!

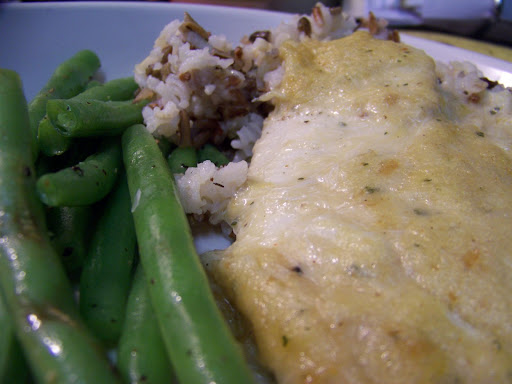
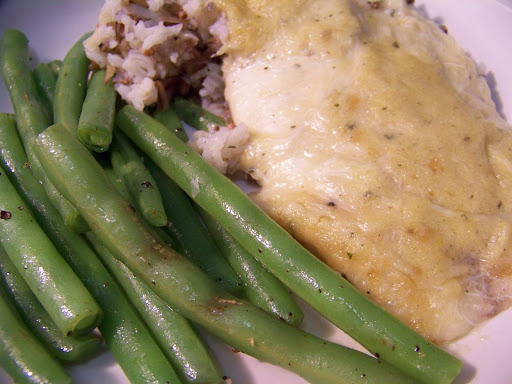
Served with some wild rice and green beans, this was indeed a love-inducing dinner. Thanks to Fiber for sharing it with us!


Tilapia with Parmesan Crab Sauce
c/o Fiber at 28 Cooks
http://28cooks.blogspot.com/2008/03/tilapia-with-parmesan-crab-sauce-i.html

Serves 4

4 tilapia filets
1 tbsp butter
2 tbsp flour
A scant 1/8 tsp nutmeg
2 tbsp soy milk
1/2 tsp Worcestershire sauce
1/8 c dry white wine
3/4 c Parmesan cheese, shredded
8 oz fresh crab meat (I use claw)

Preheat oven to 400 degrees. In a small saucepan over medium high heat, melt butter. Whisk in flour and nutmeg. Slowly whisk in milk. Continue whisking and cook until smooth. Add in Worcestershire, white wine, and Parmesan cheese. Add crab, mix well, and remove from heat. Season tilapia filets with salt and pepper. Place in well oiled baking dish. Pour sauce over tilapia. Bake in oven for 20-25 minutes. Serve and enjoy!

See the recipe...


Tuesday, June 10, 2008

Coconut-Lime Chicken & Snow Peas Salad

I wish I could say that I've been on some kind of world-tour (or maybe following Bon Jovi around on HIS tour!), and that's why I haven't been blogging. I wish. And not just because it would be cool, but because it is way more interesting than the real answer: I've been lazy. Still cooking, still photographing, even still uploading said photos and recipes into Blogger.... just too lazy to share. I know, right? Silly! I can't promise to be back on track, but I'll certainly try - and this salad is the perfect way to get started.

Why? Because it's wicked H-O-T outside. So hot, I feel like the word "hot" should be a dirty word. Seriously - it's only early June! This is ridiculous! If your heat index is anything like mine (105°), you will love this salad. Now, you will have to use the oven, but not for very long, and you don't need to stand over it, I promise.

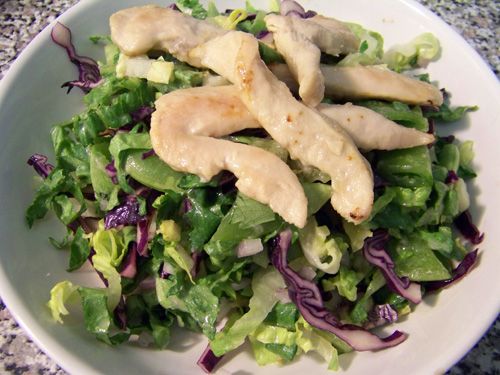
Whisk together the dressing, set some aside, and toss the chicken in. Bake it for 20 minutes and you're done with the heat. Chop up the lettuce, cabbage (great color, btw), peas and herbs and toss with the dressing. Top with the chicken. Relax with your tasty, healthy, not hot dinner. Sigh with relief.

Great flavor, this salad has. Usually, I shun lite coconut milk... it isn't as thick or as coconut-y as its full-fat kin. That said, the lite really is perfect for this salad. I think the more flavored regular coconut milk would have been too overwhelming and too thick for a salad dressing.

While I followed the recipe as-was, you may want to increase your chicken to a full pound. Four ounces each didn't seem like very much, especially considering the amount of actual salad. I have every intention of making this again, and I will use more chicken. Your call, really. The salad is great on its own, it doesn't need the chicken, but it makes the salad a bit more substantial and dinner-ready.


Coconut-Lime Chicken & Snow Peas Salad
Eating Well Magazine, Online Version
http://www.eatingwell.com/recipes/coconut_chicken_pea_salad.html

Makes 2 servings

1 cup lite coconut milk (see Tips for Two)
¼ cup lime juice
2 tablespoons brown sugar
½ teaspoon salt
8 ounces chicken tenders
4 cups shredded romaine lettuce
1 cup shredded red cabbage
1 cup sliced snow peas
3 tablespoons minced fresh cilantro
2 tablespoons minced red onion

Preheat oven to 400°F.

Whisk coconut milk, lime juice, sugar and salt in an 8-by-8-inch glass baking dish. Transfer 1/4 cup of the dressing to a large bowl; set aside. Place chicken in the baking dish; bake until cooked through, about 20 minutes.

Meanwhile, add lettuce, cabbage, snow peas, cilantro and onion to the large bowl with the dressing; toss to coat. Divide between 2 plates.

Transfer the chicken to a cutting board and thinly slice. Arrange the chicken slices on top of the salads. Drizzle 1 tablespoon of the coconut cooking liquid over each of the salads.

The dressing (Step 2) will keep for up to 2 days.

Tips for Two: Refrigerate leftover coconut milk for up to 4 days or freeze for up to 2 months. Use to make extra Coconut-Lime Dressing; drizzle on sliced fresh fruit; use as some of the liquid for cooking rice; make a Pineapple-Coconut Frappe.

Per serving: 186 calories; 3 g fat (1 g sat, 0 g mono); 67 mg cholesterol; 14 g carbohydrate; 29 g protein; 4 g fiber; 191 mg sodium; 473 mg potassium.

See the recipe...


Tuesday, June 3, 2008

TwD: French Chocolate Brownies

These are the most amazing, gluttonous chocolate brownies in the History of Ever. And I mean that. You know you are in trouble when you lick the spoon, and then use the spoon to lick the bowl, and you end up needing a tall glass of milk. Trouble that starts with T, that rhymes with B, and you get holy-crap, the best brownies ever!
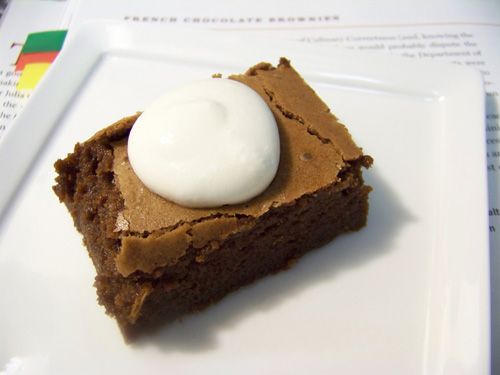
Di, of Di's Kitchen Notebook, chose for our TwD gustatory pleasure Dorie's French Chocolate Brownies. I don't know what makes them French, but I don't care. These are that good that I don't care about anything other than eating them. Short-sighted, maybe. But make these yourself and you'll understand. I would almost suggest you NOT make these, they are that dangerous. That, and I don't really want to share the world's chocolate resources with you - I want them all to myself so I can make these every day.

Well, not every day. My doctor would probably kick my ass. With 12 tablespoons of butter per pan, I would swiftly turn into a solid. My plan is ruined. I shall come up with another. World domination can come about another way: Dorie for President.

You heard me right. When we go to the polls this November and are given the opportunity to write-in our candidates, rather than vote for Mickey Mouse or Ronald McDonald, we should all vote Dorie into office. She would sooth the leaders of the world, not just with her famous World Peace cookies, but with these brownies. She could fight to lower food prices around the world and lead us all into a Chocolate Age of Happiness. Who's with me?

Before I move on to another topic, these brownies remind me a lot of Orangette's Winning Hearts and Minds cake - and you know how much I loved that cake. I skipped the inclusion of the rum and raisins. We neither care too much for each in our brownies.

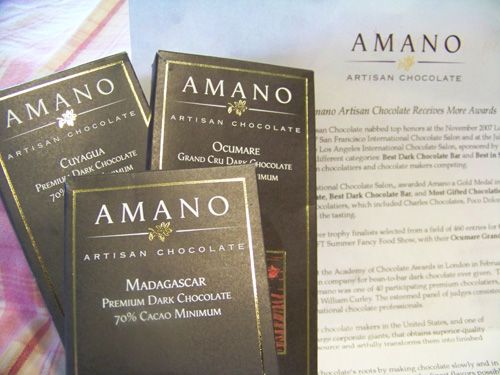
I am sure you have all heard of Blake Makes. Blake is charming and hysterical and best of all, he loves giving away free stuff. Not long ago, he had some Amano Chocolate to give away. I wasn't one of the initial winners, but the fabulous folks at Amano decided to graciously send samples to everyone that expressed interest. A short week later, a package with three (three!!!) different chocolate varieties arrived in my hot little hands. Dave and I immediately popped them out of their classy packaging and sampled a tiny bit of each. I've left my notes regarding each at home, but I will update with our thoughts this evening. Overall, the chocolate was amazing. Superb mouth-feel and clean chocolate taste. We marveled at how different each one was from the other. It is so easy to think about how different coffee or wine tastes from different regions, and chocolate is no different. I can't wait to share our thoughts on each with you!

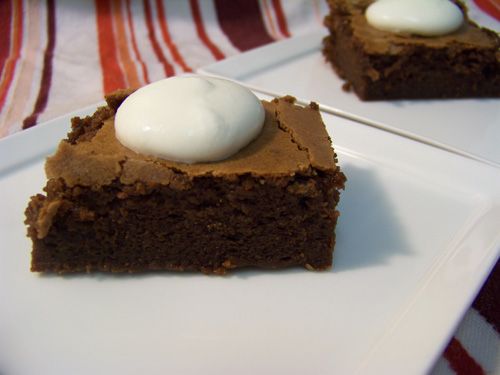
Now, each package was 2 ounces - together totaling 6 was the perfect amount for these brownies. I melted all three to use their chocolatey goodness to Dorie's recipe and the chocolate did not disappoint. The brownies are rich (seriously rich) and moist and fudgy. Make sure you have a gallon if milk on hand, because you will need it.

Remember what I said about this November. :)


French Chocolate Brownies
(adapted from Baking From My Home to Yours by Dorie Greenspan, pages 92-93)

1/2 cup all-purpose flour
1/8 teaspoon salt
1/8 teaspoon ground cinnamon
1/3 cup raisins (dark or golden)
1 1/2 tablespoons water
1 1/2 tablespoons dark rum
6 ounces bittersweet chocolate, finely chopped
1 1/2 sticks (12 tablespoons) unsalted butter, cut into 12 pieces, at room temperature
3 large eggs
1 cup sugar

Getting ready: Center a rack in the oven and preheat the oven to 300 degrees F. Line an 8-inch square baking pan with foil, butter the foil and place the pan on a baking sheet. (I lined the pan with non-stick foil and skipped the butter.)

Whisk the flour, salt and cinnamon together.

Put the raisins in a small saucepan with the water, bring to a boil over medium heat and cook until the water almost evaporates. Add the rum and let it warm for about 30 seconds, then turn off the heat, stand back and ignite the rum with a long match. Allow the flames to die down, and set the raisins aside. (I had trouble with flaming the raisins--not enough rum? Also, I like to do this quite a while before I make the rest of the recipe to give the raisins lots of time to soak up the rum.)

Put the chocolate in a heatproof bowl and set the bowl over a saucepan of simmering water. Stir occasionally until the chocolate melts. Remove the bowl from the saucepan and add the butter, stirring until it melts. It’s important that the chocolate and butter not get very hot. However, if the butter is not melting, you can put the bowl back over the still-hot water for a minute. If you’ve got a couple of little bits of unmelted butter, leave them—it’s better to have a few bits than to overheat the whole. (I used the microwave.)

Working with a stand mixer fitted with the whisk attachment, or with a hand mixer in a large bowl, beat the eggs and sugar until thick and pale, about 2 minutes. (I used the hand mixer.) Reduce the mixer speed and pour in the chocolate-butter mixture, mixing only until it is incorporated—you’ll have a thick, creamy batter. (I just used a whisk, not the mixer.) Add the dry ingredients and mix at low speed for about 30 seconds—the dry ingredients won’t be completely incorporated. Then finish folding in the dry ingredients by hand with a rubber spatula. (I used the spatula for all the mixing of the dry ingredients.) Fold in the raisins, along with any liquid remaining in the pan. Scrape the batter into the pan.

Bake for 50 to 60 minutes, or until the top is dry and crackled and a thin knife inserted into the center comes out clean. Transfer the pan to a rack and cool to warm or room temperature.

Carefully lift the brownies out of the pan, using the foil edges as handles, and transfer to a cutting board. Cut into 16 squares, each roughly 2 inches on a side, taking care not to cut through the foil.

Serving: The brownies are good just warm or at room temperature; they’re even fine cold. I like these with a little something on top or alongside—good accompaniments are whipped crème fraiche or whipped cream, ice cream or chocolate sauce or, dare I suggest, all three!

Storing: Wrapped well, these can be kept a room temperature for up to 3 days, or frozen for up to 2 months.

See the recipe...


Monday, June 2, 2008

Olive Oil-Poached Shrimp


I cannot tell you how excited I am to share this lovely dish with you as my 200th post! Yay 200th post! I don't always have the best follow-through with things, so it pleases me to not only have been blogging for over a year, but to have actually learned from and shared so much with you - fantastic!

And fantastic is the perfect way to describe these olive oil-poached shrimp. This was a new technique for me, and I'm not entirely sure I would have attempted it, but my fabulous husband (and sous-chef) requested it. I am so glad I did, because Dave and I had an awesome time pulling it together. He peeled and deveined the shrimp, infused the oil, took lots of pictures and did a ton of dishes - and kept me laughing the whole time. Collective cartoon bird-sigh, Everyone - "Awwwww!" Sappy, but true. This was a blast to make.

This recipe has a lot of steps, but don't be discouraged - nothing is tricky. It wasn't even especially time consuming, if you want to get right down to it. The oil infused while I prepared the lime syrup and roasted the poblano. The poblano steamed while I prepared the veg. The tomatoes marinated while we tidied up. Everything was ready to go by the time our friends Jeremy and Liane came over, so we were able to have quality friend time with no worries about our starter!

I did have reservations about the poaching. Would it work? Would the shrimp be oily? Would we like it? In short, it did, they weren't, and OMG, they were delicious!! Next time we make this (because we will be making this again), we'll do way more than 8 shrimp - two per person just wasn't enough! The shrimp were tender and flavored delicately with coriander and red pepper flake - and not the least bit oily!


As much as we loved the shrimp, they weren't the only stars of the show! Neither Dave nor Jeremy particularly care for tomatoes, but the marinade brightened them up to the point they didn't even taste like tomatoes - but in a good way. The cucumber salad was sweet and crunchy, crisp and smoky. The cucumber, lime zest and roasted poblano melded together in a most beautiful way. The brightness in both the tomatoes and cucumber salad was balanced deftly by the sliced avocado and mellow lime syrup. I couldn't possibly give you enough positive adjectives to explain how terrific every part of this plate was singularly, much less blended together. I can just say that it was a symphony of flavors, and each flavor came together beautifully as a whole.

Elegant and delicious, this appetizer was. A blast to create and a joy to share. Thank you for sticking with me for 200 posts. I hope I have 200 more, just as tasty as this one.


Olive Oil-Poached Shrimp
c/o Top Chef: The Cookbook
winning recipe by Lia, Season 3, Episode 4

2 tablespoons coriander seeds, crushed
1 tablespoon red pepper flakes
One 750-ml bottle olive oil
1 lime
½ cup sugar
1 ½ teaspoons cornstarch
Salt
1/3 English cucumber
1 large poblano chile
2 tablespoons minced fresh cilantro
Zest and juice of 1 Meyer lemon
Juice of ½ navel orange
1 tablespoon sherry vinegar
1 vine-ripened tomato
8 large shrimp, peeled and deveined
2 Hass avocados

In a medium saucepan over medium-high heat, toast the coriander seeds and red pepper flakes until fragrant, about 1 minute. Add the oil. Heat until just hot to the touch, then remove from the heat and let steep for 10 minutes. Strain through a sieve lined with cheesecloth and transfer to a medium saucepan.

Using a vegetable peeler, remove the zest of the lime, then trim off any white pith. (Reserve the lime.) Cut the zest into very fine dice, put it in a small saucepan, and cover with cold water. Bring to a boil, then immediately drain in a sieve. Return the zest to the pan, cover with cold water again, bring to a boil, then drain. In the saucepan, combine the sugar and ½ cup water. Add the zest and bring to a boil over high heat. Remove from the heat and let the syrup cool.

Pour the syrup through a sieve set over a clean saucepan; set the candied zest aside in a small bowl. Combine the cornstarch and 1 ½ teaspoons water. Stir the cornstarch slurry into the syrup and add 1 teaspoon salt. Bring to a boil and cook until thickened, about 3 minutes. Let cool.

Cut the cucumber in half and scrape out the seeds. Cut the cucumber, peel included, into very fine dice and put in the bowl with the candied zest.

Roast the chile directly over a gas flame, turning with tongs until add sides are lightly charred. Place the chile in a heat-proof bowl, cover with plastic wrap, and set aside for 20 minutes. Remove the blackened skin, seeds, and stems. Cut the bright green parts into very fine dice, to make 2 tablespoons. Add to the cucumber mixture, along with the juice of half the reserved lime (reserve the remaining lime for another use), ½ teaspoon of the infused oil, the cilantro, and salt to taste. Set the salad aside.

In a small bowl, combine the lemon zest and juice, orange juice, vinegar, and salt to taste. Slice the tomato into 8 thin wedges and add to the marinade. Set aside.

Warm the remaining infused oil over low heat. Sprinkle the shrimp with salt and add them to the oil – it should not be hot enough to sputter. Cook for 4 to 6 minutes, turning once, until firm. Transfer the shrimp to paper towels to drain.

Peel and thinly slice the avocados. Lightly brush some of the lime syrup onto each of 8 serving plates. Place a shrimp on one side of the brushstroke. Place avocado slices next to the shrimp. Put 1 wedge of marinated tomato between the shrimp and avocado. Using a slotted spoon to drain the excess liquid from the cucumber salad, place a small line of the salad next to the avocado. Serve immediately.

See the recipe...