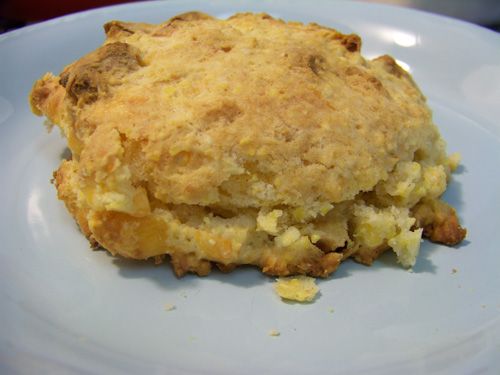
 It's been a few weeks since my last Tuesdays with Dorie entry... June was a bit of a busy and stressful month. Not even knowing what this week would hold, I promised myself and my fellow TwDers that I would participate (well, I whispered, so if you guys didn't hear me, that's why!) I couldn't have been more pleased that Karina chose these scones. Don't get me wrong, I love pies and brownies as much as the next baker, but I have a lot of love for everything breakfast food related - and these scones strike a nice balance between sweet and savory... just can't be beat.
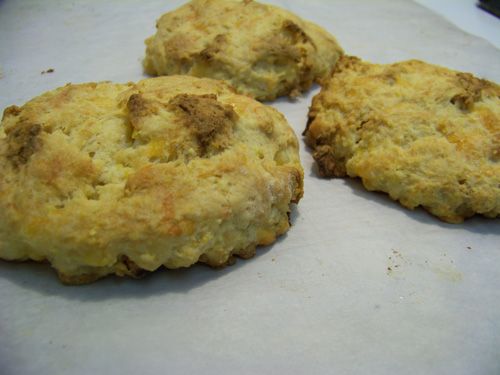 These scones are close to drop biscuits, but denser. The dried apple provided a nice, thoughtful chewiness that I found really appealing. Now, I don't normally like cheddar - but it worked really well in the scones. It wasn't the least bit over-powering - and I didn't even notice it in each bite - in fact, I rather liked it. Shocking, I know. The dough was wicked sticky - so be prepared. I didn't want to go with the traditional triangle, so I tried to use a biscuit cutter... it mostly worked (not that you can tell), but it made for a sticky fun experience.
As an added crunch, I substituted polenta for the cornmeal (as I found I didn't have any). The polenta-crunch was certainly different, but enjoyable. I sometimes find store-bought scones to be a little uninspired and boring, and these were neither of those things.
Please see Karina's blog, The Floured Apron, for the recipe, and head on over to Tuesdays with Dorie to see other marvelous ways to make a scone!
Tuesday, July 1, 2008
TwD: Apple Cheddar Scones
Posted by
Katie B.
at
9:26 AM
18
comments
![]()
Labels: cheddar, dried apple, scones, Tuesdays with Dorie, TwD
Tuesday, June 3, 2008
TwD: French Chocolate Brownies
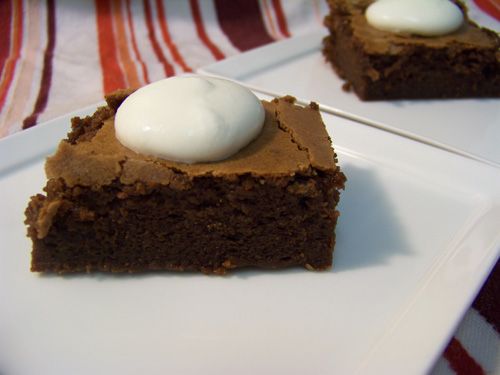 These are the most amazing, gluttonous chocolate brownies in the History of Ever. And I mean that. You know you are in trouble when you lick the spoon, and then use the spoon to lick the bowl, and you end up needing a tall glass of milk. Trouble that starts with T, that rhymes with B, and you get holy-crap, the best brownies ever!
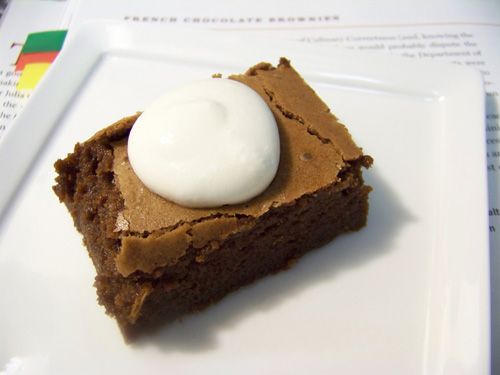 Di, of Di's Kitchen Notebook, chose for our TwD gustatory pleasure Dorie's French Chocolate Brownies. I don't know what makes them French, but I don't care. These are that good that I don't care about anything other than eating them. Short-sighted, maybe. But make these yourself and you'll understand. I would almost suggest you NOT make these, they are that dangerous. That, and I don't really want to share the world's chocolate resources with you - I want them all to myself so I can make these every day.
Well, not every day. My doctor would probably kick my ass. With 12 tablespoons of butter per pan, I would swiftly turn into a solid. My plan is ruined. I shall come up with another. World domination can come about another way: Dorie for President.
You heard me right. When we go to the polls this November and are given the opportunity to write-in our candidates, rather than vote for Mickey Mouse or Ronald McDonald, we should all vote Dorie into office. She would sooth the leaders of the world, not just with her famous World Peace cookies, but with these brownies. She could fight to lower food prices around the world and lead us all into a Chocolate Age of Happiness. Who's with me?
Before I move on to another topic, these brownies remind me a lot of Orangette's Winning Hearts and Minds cake - and you know how much I loved that cake. I skipped the inclusion of the rum and raisins. We neither care too much for each in our brownies.
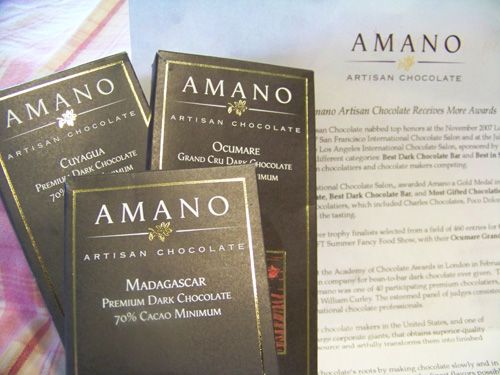 I am sure you have all heard of Blake Makes. Blake is charming and hysterical and best of all, he loves giving away free stuff. Not long ago, he had some Amano Chocolate to give away. I wasn't one of the initial winners, but the fabulous folks at Amano decided to graciously send samples to everyone that expressed interest. A short week later, a package with three (three!!!) different chocolate varieties arrived in my hot little hands. Dave and I immediately popped them out of their classy packaging and sampled a tiny bit of each. I've left my notes regarding each at home, but I will update with our thoughts this evening. Overall, the chocolate was amazing. Superb mouth-feel and clean chocolate taste. We marveled at how different each one was from the other. It is so easy to think about how different coffee or wine tastes from different regions, and chocolate is no different. I can't wait to share our thoughts on each with you!
Now, each package was 2 ounces - together totaling 6 was the perfect amount for these brownies. I melted all three to use their chocolatey goodness to Dorie's recipe and the chocolate did not disappoint. The brownies are rich (seriously rich) and moist and fudgy. Make sure you have a gallon if milk on hand, because you will need it.
Remember what I said about this November. :)
(adapted from Baking From My Home to Yours by Dorie Greenspan, pages 92-93)
1/2 cup all-purpose flour
1/8 teaspoon salt
1/8 teaspoon ground cinnamon
1/3 cup raisins (dark or golden)
1 1/2 tablespoons water
1 1/2 tablespoons dark rum
6 ounces bittersweet chocolate, finely chopped
1 1/2 sticks (12 tablespoons) unsalted butter, cut into 12 pieces, at room temperature
3 large eggs
1 cup sugar
Getting ready: Center a rack in the oven and preheat the oven to 300 degrees F. Line an 8-inch square baking pan with foil, butter the foil and place the pan on a baking sheet. (I lined the pan with non-stick foil and skipped the butter.)
Whisk the flour, salt and cinnamon together.
Put the raisins in a small saucepan with the water, bring to a boil over medium heat and cook until the water almost evaporates. Add the rum and let it warm for about 30 seconds, then turn off the heat, stand back and ignite the rum with a long match. Allow the flames to die down, and set the raisins aside. (I had trouble with flaming the raisins--not enough rum? Also, I like to do this quite a while before I make the rest of the recipe to give the raisins lots of time to soak up the rum.)
Put the chocolate in a heatproof bowl and set the bowl over a saucepan of simmering water. Stir occasionally until the chocolate melts. Remove the bowl from the saucepan and add the butter, stirring until it melts. It’s important that the chocolate and butter not get very hot. However, if the butter is not melting, you can put the bowl back over the still-hot water for a minute. If you’ve got a couple of little bits of unmelted butter, leave them—it’s better to have a few bits than to overheat the whole. (I used the microwave.)
Working with a stand mixer fitted with the whisk attachment, or with a hand mixer in a large bowl, beat the eggs and sugar until thick and pale, about 2 minutes. (I used the hand mixer.) Reduce the mixer speed and pour in the chocolate-butter mixture, mixing only until it is incorporated—you’ll have a thick, creamy batter. (I just used a whisk, not the mixer.) Add the dry ingredients and mix at low speed for about 30 seconds—the dry ingredients won’t be completely incorporated. Then finish folding in the dry ingredients by hand with a rubber spatula. (I used the spatula for all the mixing of the dry ingredients.) Fold in the raisins, along with any liquid remaining in the pan. Scrape the batter into the pan.
Bake for 50 to 60 minutes, or until the top is dry and crackled and a thin knife inserted into the center comes out clean. Transfer the pan to a rack and cool to warm or room temperature.
Carefully lift the brownies out of the pan, using the foil edges as handles, and transfer to a cutting board. Cut into 16 squares, each roughly 2 inches on a side, taking care not to cut through the foil.
Serving: The brownies are good just warm or at room temperature; they’re even fine cold. I like these with a little something on top or alongside—good accompaniments are whipped crème fraiche or whipped cream, ice cream or chocolate sauce or, dare I suggest, all three!
Storing: Wrapped well, these can be kept a room temperature for up to 3 days, or frozen for up to 2 months.
Posted by
Katie B.
at
12:15 PM
21
comments
![]()
Labels: Amano, brownies, chocolate, Dorie Greenspan, Tuesdays with Dorie, TwD
Tuesday, May 20, 2008
TwD: Ugly but Delicious
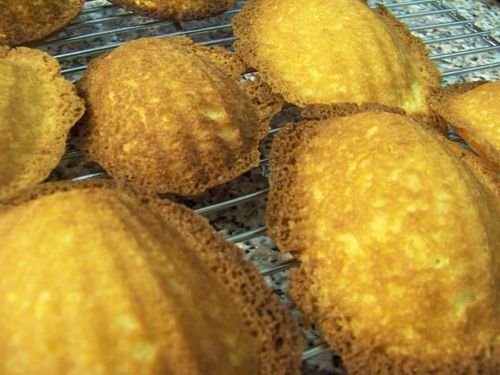 I can't begin to tell you how excited I was to see madeleines chosen for this installment of Tuesdays with Dorie. I had a lovely experience making them before, and knew that Dorie's would be just as excellent!
 Who cares if they weren't pretty - because they made up for it in the taste department. They were perfectly lemony and sweet without being too much of either. I really like Dorie's direction to blend the sugar and the lemon zest before you start - the fragrance is heavenly. If it weren't weird to do so, I could just eat it with a spoon. I restrained myself and moved forward.
I would like to think it was some kind of rookie mistake... and certainly, I won't let it happen again, but I totally over-filled my pan. The batter was thick (and delicious) and I just spooned these heaping spoonfuls into the molds. That said, I could have ended up with more than just 12. If you don't count all the batter I ate - tested! - this could have netted at least 16 cookies... maybe 18. They didn't suffer for it, but they weren't as adorable and cute as I'd hoped.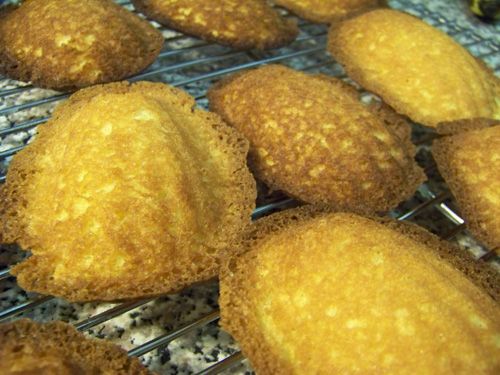
All 12 cookies were gone in 12 hours. We had a bunch the night I made them and the rest for breakfast the day after. (Bacon and eggs are over-rated.) I fully intended to make these again over the weekend, and make them properly. Sadly, it just didn't happen. These lovely babies WILL be made again, however. They are too tasty to resist.
My thanks to Tara for a lovely choice! Please go check out the other bakers at Tuesdays with Dorie - their madeleines are MUCH prettier!
Traditional Madelines
c/o Baking: From My Home to Yours, by Dorie Greenspan
http://www.amazon.de/Baking-Home-Yours-Dorie-Greenspan/dp/0618443363/ref=sr_1_1?ie=UTF8&s=books-intl-de&qid=1209562505&sr=1-1
2/3 cup all-purpose flour
¾ teaspoon baking powder
Pinch of salt
½ cup sugar
Grated zest of 1 lemon
2 large eggs, at room temperature
2 teaspoons pure vanilla extract
¾ stick (6 tablespoons) unsalted butter, melted and cooled
Confectioners’ sugar, for dusting
Whisk together the flour, baking powder and salt.
Working in a mixer bowl, or in a large bowl, rub the sugar and lemon zest together with your fingertips until the sugar is moist and fragrant. Add the eggs to the bowl. Working with the whisk attachment, or with a hand mixer, beat the eggs and sugar together on medium-high speed until pale, thick and light, 2 to 3 minutes. Beat in the vanilla. With a rubber spatula, very gently fold in the dry ingredients, followed by the melted butter. Press a piece of plastic wrap against the surface of the batter and refrigerate it for at least 3 hours, or for up to 2 days. This long chill period will help the batter form the hump that is characteristic of madeleines. (For convenience, you can spoon the batter into the madeleine molds, cover and refrigerate, then bake the cookies directly from the fridge; see below for instructions on prepping the pans.)
GETTING READY TO BAKE:
Center a rack in the oven and preheat the oven to 400 degrees F. Butter 12 full-size madeleine molds, or up to 36 mini madeleine molds, dust the insides with flour and tap out the excess. Or, if you have a nonstick pan (or pans), give it a light coating of vegetable cooking spray. If you have a silicone pan, no prep is needed. Place the pan(s) on a baking sheet.
Spoon the batter into the molds, filling each one almost to the top. Don’t worry about spreading the batter evenly, the oven’s heat will take care of that. Bake large madeleines for 11 to 13 minutes, and minis for 8 to 10 minutes, or until they are golden and the tops spring back when touched.
Remove the pan(s) from the oven and release the madeleines from the molds by rapping the edge of the pan against the counter. Gently pry any recalcitrant madeleines from the pan using your fingers or a butter knife. Transfer the cookies to a rack to cool to just warm or to room temperature.
If you are making minis and have more batter, bake the next batch(es), making certain that you cool, then properly prepare the pan(s) before baking.
Just before serving, dust the madeleines with confectioners’ sugar.
Makes 12 large or 36 mini cookies
Serving: Serve the cookies when they are only slightly warm or when they reach room temperature, with tea or espresso.
Storing: Although the batter can be kept in the refrigerator for up to 2 days, the madeleines should be eaten soon after they are made. You can keep them overnight in a sealed container, but they really are better on day 1. If you must store them, wrap them airtight and freeze them; they’ll keep for up to 2 months.
Posted by
Katie B.
at
10:57 AM
27
comments
![]()
Labels: Dorie Greenspan, madeleines, Tuesdays with Dorie, TwD
Tuesday, May 13, 2008
TwD: It's Like Geology!

I am a brand new member of Tuesdays with Dorie. I'd been watching them for ages (because who doesn't like Dorie!) and I really wanted to get in on the fun!
What is Tuesdays at Dorie, you ask? Well, Laurie of Quirky Cupcake wanted a way to push herself to bake more, and to bake more specifically from Dorie Greenspan's Baking: From My Home to Yours. She realized that there was no better way than to get a group together... because much like working out at the gym, sometimes you just need a push. Each week, a member selects the next recipe and the party starts anew. This week, Dianne chose the Florida Pie. While I adore both key lime pie and coconut cream pie, I'd never had the two on a spoon at once. I don't know why, but I was a little nervous about the combination. Seriously, what was I thinking?? The tart lime layer combined beautifully with the coconut cream layer! I don't know how I'll ever be able to go back to single-flavor pie again! My favorite part is how it looks sliced in half. You have the older Coconut Cream Period, followed by the creamy Lime Age. We currently live in the Era of Meringue - and if you look closely, you can see teensy little coconut trilobites! Heh.
 We are encouraged to make the recipes our own - so I opted to make mini-pies in large cupcake tins. I had a bit of a panic attack trying to get them out again, but suffered no broken pies. Only issue we did have with them miniaturized was that the bottom crust was thick and difficult to cut through. It didn't stop us, but it is worth noting. :)
This recipe isn't difficult in the slightest, but it isn't quick. The pies have to set in the freezer in various stages, so plan this dessert out in advance.
Florida Pie
c/o Baking: From My Home to Yours, by Dorie Greenspan
http://www.amazon.com/Baking-Home-Yours-Dorie-Greenspan/dp/0618443363
1 9-inch graham cracker crust (page 235), fully baked and cooled, or a store-bought crust
1 1/3 cups heavy cream
1 1/2 cups shredded sweetened coconut
4 large eggs, separated
1 14-ounce can sweetened condensed milk
1/2 cup fresh Key (or regular) lime juice (from about 5 regular limes)
1/4 cup of sugar
Getting Ready:
Center a rack in the oven and preheat the oven to 350 degrees F. Put the pie plate on a baking sheet lined with parchment of a silicone mat.
Put the cream and 1 cup of the coconut in a small saucepan and bring it to a boil over medium-low heat, stirring almost constantly. Continue to cook and stir until the cream is reduced by half and the mixture is slightly thickened. Scrape the coconut cream into a bowl and set it aside while you prepare the lime filling.
Working with a stand mixer, preferably fitted with a paddle attachment, or with a hand mixer in a large bowl beat the egg yolks at high speed until thick and pale. Reduce the mixer speed to low and beat in the condensed milk. Still on low, add half of the lime juice. When it is incorporated, add the reaming juice, again mixing until it is blended. Spread the coconut cream in the bottom of the graham cracker crust, and pour over the lime filling.
Bake the pie for 12 minutes. Transfer the pie to a cooling rack and cool for 15 minutes, then freeze the pie for at least 1 hour.
To Finish the Pie with Meringue:
Put the 4 egg whites and the sugar in a medium heavy-bottomed saucepan and heat over medium-low heat, whisking all the while, until the whites are hot to the touch. Transfer the whites to a stand mixer, fitted with the whisk attachment, or use a hand mixer in a large bowl, and beat the whites at high speed until they reach room temperature and hold firm peaks. Using a rubber spatula, fold the remaining 1/2 cup coconut into the meringue.
Spread the meringue over the top of the pie, and run the pie under the broiler until the top of the meringue is golden brown. (Or, if you've got a blowtorch, you can use it to brown the meringue.) Return the pie to the freezer for another 30 minutes or for up to 3 hours before serving.
Posted by
Katie B.
at
2:26 PM
25
comments
![]()
Labels: coconut cream, Dorie Greenspan, Florida Pie, graham cracker crust, key lime, Tuesdays with Dorie, TwD


