Sunday, April 27, 2008

My Cheesecake is Cool, My Cheesecake be Poppin'


They're popping, they're popping!

(Let me preface by saying that I'm a raging nerd for just linking to this song. What it's doing on my ipod is a mystery. I was trying to come up with a title to this entry, and I couldn't shake the lyrics. Hey, it's catchy!)

Welcome to the April Daring Bakers Challenge - Cheesecake Pops! Elle and Deborah are our hostesses, and I could reach through the computer and hug them! I was so excited about this challenge that I got to planning my pop flavorings out right away. This is a vast departure for me, because I almost always wait until the last minute to complete my challenge (and thusly, because I am in a frenzied panic, I am rarely creative.) Cheesecake and graham crackers are friends, but I wanted to pop it in less traditional ways. I split the cheesecake batter into three different 9-inch round cake pans and flavored each differently.
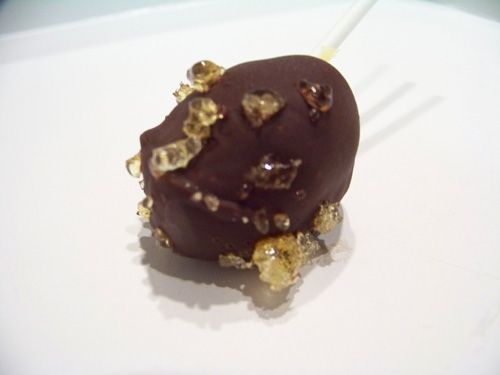
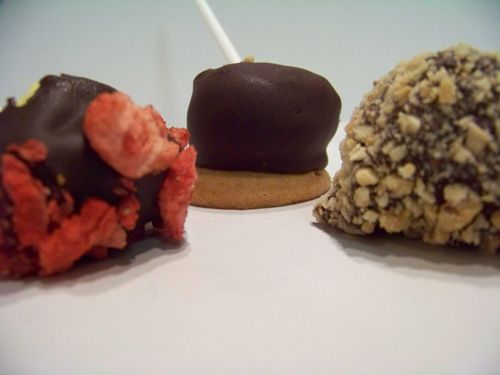
I will lead with my favorite. Of this pop, there was only one. It was something spontaneous and interesting, but turned out to rather tricky. What you see to the left is a vanilla cheesecake pop, dipped in chocolate and sprinkled with a crushed Honey Drop. I processed the drop in my mini-chopper and sprinkled the bits onto the pop. I had hoped that the drop crumbles would be something I could dip into, but they were too busy sticking to each other to latch on to the chocolate. I had a tray of pops before me, so I moved on to the peanut butter pops. I wish had persevered, because the honey/chocolate/cheesecake combination was so, so amazing. Honibe's Honey Drops have such a delicate honey flavor, and the sprinkles imparted a soft sweetness to the lush creaminess of the cheesecake and chocolate.
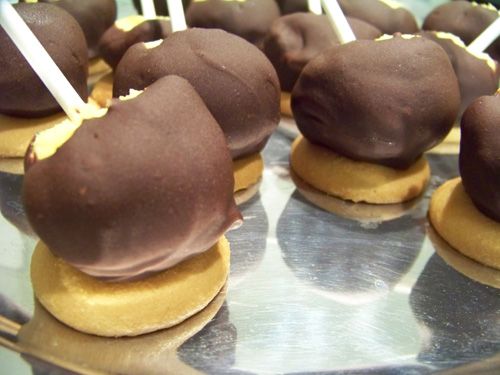
For my second pop, my goal was chocolate banana pudding on a stick. I flavored the cheesecake itself with banana essence. Once dipped, I placed each pop on a nilla wafer and called it a day! Dave thinks I'm nuts, but they remind me of a little French girl once picked up. (Yanno, with the jaunty beret!)
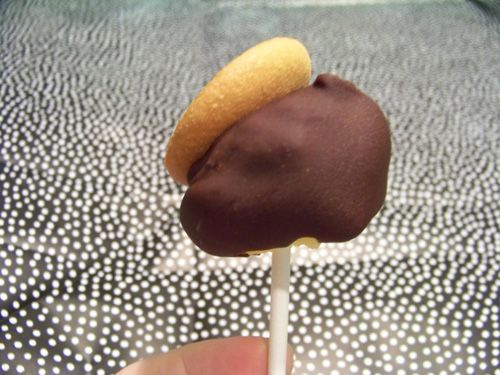


You see it, too, don't you?
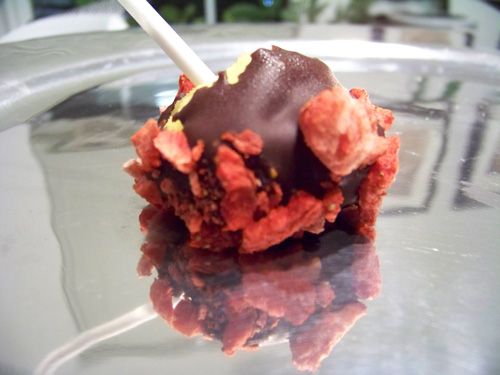


The flavoring I am most proud of, and the one that caused me the most anxiety, is the strawberry balsamic pop. I knew I could do it, but would it be as delicious as I'd hoped? I flavored the chocolate with 2 tablespoons of balsamic vinegar. Once dipped, each vanilla pop went into a bowl of crushed freeze-dried strawberries (Yeah, astronaut food!) These inside-out chocolate-dipped strawberries exceeded my expectations. The sweetness of the balsamic vinegar paired perfectly with the strawberries.
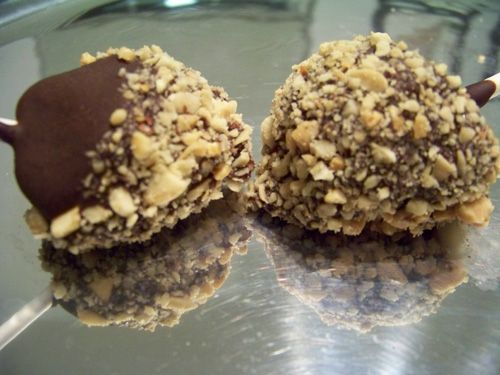
Last but not least, and Dave's favorite, are the peanut-dipped pops. I tried to flavor the cheesecake with peanut butter essence, but it didn't seem to take. I couldn't tell the difference between it and the plain vanilla cheesecake. I tried to make up for that by adding some peanut butter to the melted chocolate, which seemed to do the trick. Rolled in peanuts, these little beauties had the right balance of creamy AND crunchy. They were by far the easiest to make and the most universally approved of. I think these would have been great with almonds or pistachios, too.
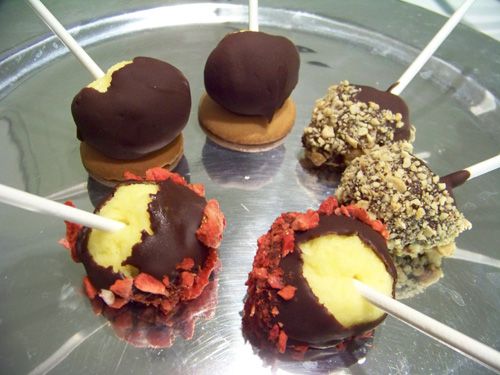

I couldn't be happier with the outcome of this challenge. Sure, it took me three days, but it was well worth it. These pops would be awesome for a party or shower, and at the very least, they made my husband and coworkers very happy.

Big pop props to Deborah and Elle - thank you for a fantastic challenge!

For 1000 other pops, click over to the Daring Bakers Blogroll!


Cheesecake Pops
from Sticky, Chewy, Messy, Gooey by Jill O’Connor
http://www.amazon.com/Sticky-Chewy-Messy-Gooey-Desserts/dp/081185566X/ref=pd_bbs_sr_1?ie=UTF8&s=books&qid=1209261000&sr=8-1

Makes 30 – 40 Pops

5 8-oz. packages cream cheese at room temperature
2 cups sugar
¼ cup all-purpose flour
¼ teaspoon salt
5 large eggs
2 egg yolks
2 teaspoons pure vanilla extract
¼ cup heavy cream
Boiling water as needed

Thirty to forty 8-inch lollipop sticks

1 pound chocolate, finely chopped – you can use all one kind or half and half of dark, milk, or white (Alternately, you can use 1 pound of flavored coatings, also known as summer coating, confectionary coating or wafer chocolate – candy supply stores carry colors, as well as the three kinds of chocolate.)

2 tablespoons vegetable shortening

(Note: White chocolate is harder to use this way, but not impossible)

Assorted decorations such as chopped nuts, colored jimmies, crushed peppermints, mini chocolate chips, sanding sugars, dragees) - Optional

Position oven rack in the middle of the oven and preheat to 325 degrees F. Set some water to boil.

In a large bowl, beat together the cream cheese, sugar, flour, and salt until smooth. If using a mixer, mix on low speed. Add the whole eggs and the egg yolks, one at a time, beating well (but still at low speed) after each addition. Beat in the vanilla and cream.

Grease a 10-inch cake pan (not a springform pan), and pour the batter into the cake pan. Place the pan in a larger roasting pan. Fill the roasting pan with the boiling water until it reaches halfway up the sides of the cake pan. Bake until the cheesecake is firm and slightly golden on top, 35 to 45 minutes.

Remove the cheesecake from the water bath and cool to room temperature. Cover the cheesecake with plastic wrap and refrigerate until very cold, at least 3 hours or up to overnight.

When the cheesecake is cold and very firm, scoop the cheesecake into 2-ounce balls and place on a parchment paper-lined baking sheet. Carefully insert a lollipop stick into each cheesecake ball. Freeze the cheesecake pops, uncovered, until very hard, at least 1 – 2 hours.

When the cheesecake pops are frozen and ready for dipping, prepare the chocolate. In the top of a double boiler, set over simmering water, or in a heatproof bowl set over a pot of simmering water, heat half the chocolate and half the shortening, stirring often, until chocolate is melted and chocolate and shortening are combined. Stir until completely smooth. Do not heat the chocolate too much or your chocolate will lose it’s shine after it has dried. Save the rest of the chocolate and shortening for later dipping, or use another type of chocolate for variety.

Alternately, you can microwave the same amount of chocolate coating pieces on high at 30 second intervals, stirring until smooth.

Quickly dip a frozen cheesecake pop in the melted chocolate, swirling quickly to coat it completely. Shake off any excess into the melted chocolate. If you like, you can now roll the pops quickly in optional decorations. You can also drizzle them with a contrasting color of melted chocolate (dark chocolate drizzled over milk chocolate or white chocolate over dark chocolate, etc.) Place the pop on a clean parchment paper-lined baking sheet to set. Repeat with remaining pops, melting more chocolate and shortening (or confectionary chocolate pieces) as needed.

Refrigerate the pops for up to 24 hours, until ready to serve.

See the recipe...


Wednesday, April 23, 2008

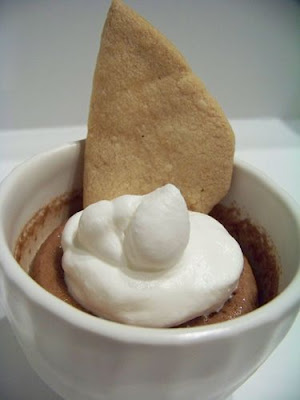
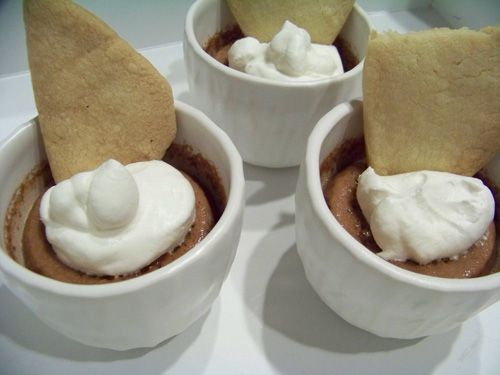
Chocolate Mascarpone Cheesecake Pots with Shortbread Cookies

Do you have a dinner party coming up? Do you want an amazing dessert that you can prepare ahead of time? One that will wow your friends and family? If so, these cheesecakes are for you!

Our friends Jeremy and Liane came over for dinner last week, for a revisit to the shrimp tacos. Considering that the dinner could be spicy, I wanted something creamy and luscious for dessert. (And I'd received these adorable dessert cups for my birthday and I wanted to try them out!)

I was also tickled to be able to use a tub of mascarpone from the dairy lady at my local farmer's market. (I'll try to get her name next time... although, the Dairy Lady has a nice ring to it!) Mascarpone is like an Italian cream cheese, and figures prominently in tiramisu. If you can't find any (or if it's marked up something crazy), you can substitute straight cream cheese or a mix of equal parts cream cheese to sour cream.

There aren't many ingredients to this dessert, so try to use the best you can get your hands on. Those seven (eight, if you include the rum - I didn't) come together easily. I only realized as I typed up the recipe that I neglected to cover the pan of pots with aluminum foil... my pots came out fine, but I'd be interested to see how they turned out if I'd paid attention. Evidently I was too interested in licking the contents of the bowl and less interested in the directions. Oops!

While the cheesecakes are rather tasty warm from the oven (what? like you wouldn't try one), they are MUCH better after getting their chill on in the fridge. Trust me. You could probably also divide the batter between six cups instead of 8, to make a bigger serving per person. I actually liked the smaller amount, because the cheesecake was really rich, and I found the eight or so spoonfuls to be the perfect amount.

Now, on to the cookies. I wish I had a spoon-shaped cookie cutter. I don't and I was too lazy to go tracing any spoons for these cookies... but I'm sure the triangles are just as delicious! The only hard part is waiting for the dough to firm up. When I want cookies, I WANT COOKIES! I made the dough and let it rest in the fridge overnight. I took the dough out the next day when I got home from work and it was really stiff - too tough to roll out. I let it sit on the counter for about 20 minutes before I formed the cookies. I waited to bake them until an hour before we had dessert (we were stuffed with tacos!) and they were done and cool by the time we wanted them. I only went for 25 minutes, and they could probably have come out a little sooner. I think I'd keep an eye on them if you go for the spoon shape - they'd bake even quicker!

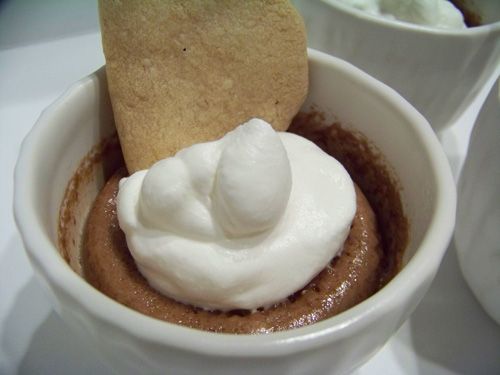
These cookies were delightfully crisp. The corners of the triangles served as tasty little cheesecake-bearing utensils (too bad we can't eat more things on cookies, eh?) These cookies would be great for use as a sandwich cookie or for ice cream sandwiches, too. Def. saving these to my keeper file.

Topped with a dollop of whipped cream and accented with a crisp, tasty cookie, had with friends or snuggled in bed late at night (which is how the rest of them went) and you have a great night on your hands!

Chocolate Mascarpone Cheesecake Pots with Shortbread Spoons
From: Sticky, Chewy, Messy, Gooey: Desserts for the Serious Sweet Tooth by Jill O’Connor
http://www.amazon.com/Sticky-Chewy-Messy-Gooey-Desserts/dp/081185566X/ref=pd_bbs_sr_1?ie=UTF8&s=books&qid=1208805807&sr=8-1

The silky, rich flavor or Italian mascarpone cheese marries well with dark chocolate and makes for a sublime cheesecake, baked up smooth and buttery in little custard cups and eaten with crunchy, sweet, and delightfully edible shortbread spoons! Add a dollop or whipped cream and a few chocolate curls to the tops of these individual cheesecake pots for the perfect dinner-party dessert.

Serves 8.

1 cup heavy cream
4 ounces semisweet chocolate, finely chopped
8 ounces mascarpone cheese
¼ cup sugar
3 large eggs
1 teaspoon pure vanilla extract
Pinch of salt
1 tablespoon dark rum, brandy or grand marnier (optional)
Boiling water as needed
Sweetened whipped cream and chocolate curls, for serving
Shortbread spoons, recipe follows

Position a rack in the middle of the oven and preheat to 325°F.

In a saucepan, bring the cream to a simmer over medium heat. Remove the pan from the heat before the cream starts to boil and add the chocolate, stirring constantly until mixture is smooth. Set aside and let cool to room temperature.

In a large bowl, whisk together the mascarpone and sugar until smooth. Add the eggs one at a time, whisking well after each addition until the mixture is smooth. Add the vanilla, salt and rum (if using) and whisk to combine.

Pour the cooled chocolate mixture into the mascarpone cheese mixture and whisk gently until smooth.

Put eight 4-ounce custard cups, ramekins, or small ovenproof coffee cups in an empty 9-by-13-inch baking pan. Divide the chocolate-cheesecake mixture among the cups.

Put the baking dish in the oven and carefully pour boiling water into the pan, adding just enough water to reach halfway up the sides of the custard cups. Cover with aluminum foil.

Bake until the tops of the cheesecakes appear solid but jiggle slightly when shaken, 30 to 40 minutes. The perfect consistency is a little soft, but not liquid. The cheesecake pots will firm up as they cool. Transfer the pots from the baking pan to a wire rack and let cool to room temperature. Cover each pot with plastic wrap and refrigerate for at least 4 hours or preferably overnight before serving. The cheesecake pots can be prepared up to 2 days before serving.

Top each cheesecake pot with a dollop of whipped cream and a few chocolate curls and serve with a shortbread spoon.


Shortbread Spoons

From: Sticky, Chewy, Messy, Gooey: Desserts for the Serious Sweet Tooth by Jill O’Connor http://www.amazon.com/Sticky-Chewy-Messy-Gooey-Desserts/dp/081185566X/ref=pd_bbs_sr_1?ie=UTF8&s=books&qid=1208805807&sr=8-1
There is nothing more fun than these little cookie spoons. I was lucky enough to find a spoon-shaped cookie cutter, but you can also use a small, sharp paring knife to cut these spoons freehand from the rolled-out dough. Use a small spoon (I like the size of infant feeding spoons) on the dough to use as a template. Chill the cutout cookies until very firm and cold – they will hold their shape better as they bake.
Makes about 12 spoons
½ cup (1 stick) unsalted butter, room temperature
1 cup confectioner’s sugar, sifted
1 teaspoon pure vanilla extract
1 cup unbleached all-purpose flour
¼ teaspoon salt
In a bowl, cream together the butter and sugar. Stir in the vanilla. Add the flour and salt and stir together until the mixture forms a soft dough. Pat the dough into a disk and wrap in plastic wrap. Refrigerate for at least hour and up to 1 week.
On a lightly floured work surface, roll the dough out to ¼ inch thick and cut into 4-in spoons. Place the shortbread spoons on a parchment paper-lined baking sheet and refrigerate until cold and very firm, 45 to 60 minutes.
Position a rack in the middle of the oven and preheat to 300°F.
Remove the shortbread spoons from the refrigerator and immediately place in the oven. Bake until the edges of the cookies are a pale, golden brown but the centers are still very pale, 25 to 30 minutes. Transfer the baking sheets to wire racks and let cool slightly. Using a large metal spatula, transfer the cookies from the baking sheets to the wire racks and let cool to room temperature.
Store the cookies, tightly covered at room temperature, for up to 3 days, or freeze for up to 2 weeks.

See the recipe...


Monday, April 21, 2008

Scallops with Edamame Salad and Puree

We thought we were so smart, getting curtains for our bedroom. I'd bitched and moaned about the morning light for long enough, it seems. We chose a set that goes eerily well with our sheets and hung them with no issues. Until the next two mornings, when it was close-to-impossible to get out of bed. I'd heard it advertised in fancy alarm clocks, but I'd never given much thought to how light helps you wake up in the morning. Mind you, our room isn't THAT much darker... but it is just enough darker that I'm having trouble. Can't just be happy, can I? :)

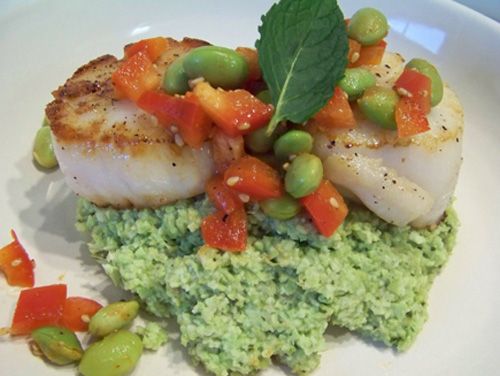
Except, I AM happy! Let me tell you why! Ever since I saw this amazing dish on Sher's site, I've been waiting for just the right moment to make these gorgeous scallops with edamame. I happened to be at the butcher over the weekend and he had these beauties! Only 7 to a pound! That's nuts! Her recipe calls for 12, but since it was just the two of us for dinner, I opted for an even pound of scallops.

While the edamame cooked per their bag's instructions, I chopped and blended away. When they were finished and prepared as needed (tossed or pureed), I cooked the scallops. In less than 10 minutes, dinner was ready. And what a dinner it was!

"Spring on a plate" had been one of the reviews of the original, and I heartily second. The bright, fresh flavors of the beans and red bell pepper (tossed with the chili paste) provided the right amount of heat atop the scallops and puree. The puree itself was thick and had a really nice chew to it - and I totally didn't expect that. The play of textures was just brilliant - delicate scallop, sassy salad, both atop a fresh, thick puree, heady with mint.

I cannot thank Sher enough for sharing this fantastic meal with us!

Scallops with Edamame Salad and Puree
c/o Sher at What Did You Eat?
http://whatdidyoueat.typepad.com/what_did_you_eat/2008/03/scallops-with-e.html

Serves 4.

Start with a 16 ounce bag of frozen shelled edamame and divide according to below to make the salad and puree.

Salad
1/2 cup shelled edamame, cooked according to package instructions
1/2 cup red bell pepper, finely chopped
1 Tablespoon white or black sesame seeds
1 Tablespoon lime juice
1/2 Asian chili paste
1/4 teaspoon coarse salt
freshly ground black pepper

Combine all the ingredients and set aside.

Puree
2-1/2 cups of the cooked edamame, (The rest of the package)
1/4 cup lime juice
1/3 cup water
2 Tablespoons chopped fresh mint
1 Tablespoon chopped garlic
1/4 teaspoon salt
ground pepper

If the soy beans are warm when you make this, the puree will be ready to use. If you make it in advance, reheat it in a small skillet or the microwave.

Process all the ingredients in a food processor until smooth.

Making the dish
12 sea scallops
1 teaspoon salt
pepper
1 Tablespoon olive oil

Season both sides of the scallops with salt and pepper. Heat oil in a large non-stick skillet until very hot, but not smoking. Cook the scallops until golden brown, about 1-2 minutes per side. Don't overcook!

Divide the warm puree among serving plates, top with scallops and the salad.

See the recipe...


Thursday, April 17, 2008

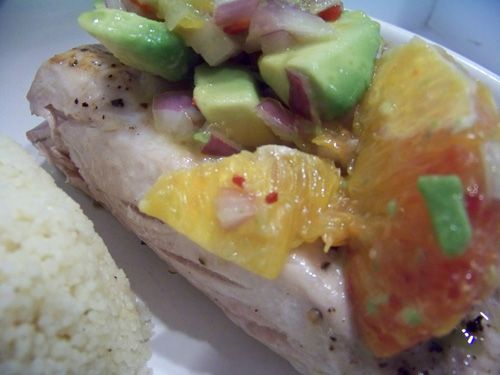
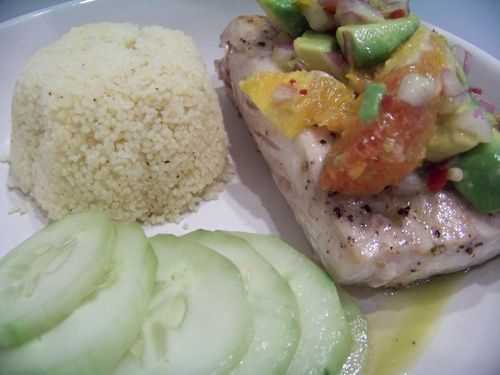
Mahi-mahi with Blood Orange, Avocado, and Red Onion Salsa


Today was one of those days. I felt like I was herding cats. Every time I thought I had a handle on something, a new situation arose. Not that my job is brain surgery or rocket science, far from it actually... but today... whoa.

The best part of my day was this meal. I love how fresh fish combined with fresh, clean-flavored ingredients make me feel like I'm eating "spa food." You know what I'm talking about... a refreshing plate you'd have after your aromatherpy hot stone mud massage with rose petals.


Because, believe me, that is how I felt when eating this. The fish was so simply done with salt and pepper that the salsa really had the opportunity to shine. The sweet-tartness of the blood orange combined with the creamy avocado and the zingy red pepper in a way that tasted like fate... as though blood oranges, avocado, and red onion are grown only to be friends. No fussiness, very little effort, just happiness.

I took a reader's suggestion (in the comments of the Bon Appetit recipe online) and served this with plain couscous and a cucumber salad. I sliced the cucumber and tossed it with blood orange olive oil and pomegranite vinegar (I know, right? Could this have been more perfect?), but any vinegar/oil/citrus would do well.

I can't explain it, and I feel weird even typing it, but this dinner made my day. It was exactly what I needed.


Mahi-mahi with Blood Orange, Avocado, and Red Onion Salsa
Adapted from: Bon Appétit Magazine, February 2005
http://www.epicurious.com/recipes/food/views/231590

1 blood orange, Cara Cara orange, or regular orange
1/2 cup 1/3-inch cubes avocado
1/3 cup chopped red onion
2 teaspoons minced red jalapeño
2 teaspoons fresh lime juice
2 teaspoons olive oil
2 6-ounce mahi-mahi fillets
1 large cucumber, sliced
2 cups prepared couscous

Using small sharp knife, cut peel and white pith from orange. Working over small bowl, cut between membranes to release segments. Add avocado, onion, jalapeño, and lime juice to oranges in bowl; stir gently to blend. Season salsa to taste with salt.

Heat oil in heavy medium skillet over medium-high heat. Sprinkle fish with salt and pepper. Add fish to skillet and sauté until brown and cooked through, about 5 minutes per side.

Place 1 fillet on each of 2 plates. Spoon salsa atop fish and serve with cucumber slices and couscous.

>> Orange you sweet: Although they look like regular navel oranges, Cara Cara oranges are tinged pink on the inside and taste a little sweeter. You'll find them at some supermarkets and farmers' markets.


See the recipe...


Tuesday, April 15, 2008

Green Chile Chicken and Pink Bean Stew

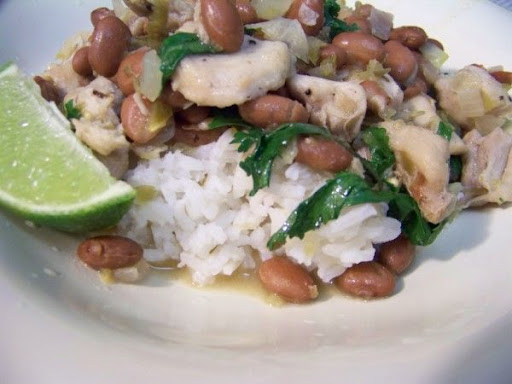
I had really hoped that these pink beans would be as pink as the beans in the photo on the outside of the can. As you can see, they aren't so pink. O well. Should you not be able to find pink beans at your grocers, feel free to use pinto or kidney beans. You won't miss out!

As a recent convert to chicken thighs, I really loved this meal. Quick, flavorful and easy - can't go wrong! The heat provided by the two (yes two!) cans of green chiles was hot - and addictive. Even though it made my face sweat, I went back for more! Not so practical a dish once the weather warms up for good, but since we're in that grey weather period (is it hot, is it cold, should I bring an umbrella?), this is perfect for when the evening turns cold.

What's nice, too, is the cilantro and lime. Those flavors together brighten up the thighs and beans, and balance the heat in the chiles really well.

This didn't make enough for a small army, like most stews, but should you have leftovers, it does really well as lunch the day after and I bet it would freeze well.


Green Chile Chicken and Pink Bean Stew
c/o Food and Wine Magazine, April 2008
http://www.foodandwine.com/recipes/green-chile-chicken-and-pink-bean-stew

Canned green chiles contribute flavor and heat to this thick chicken stew, made doubly satisfying with the addition of pink beans. Pink beans are similar to pinto and kidney beans, and they give this recipe a nice Latin feel.

2 tablespoons vegetable oil
1 1/2 pounds skinless, boneless chicken thighs, cut into 1-inch dice
Kosher salt and freshly ground pepper
1 white onion, cut into 1/2-inch dice
2 garlic cloves, minced
1 1/4 teaspoons ground cumin
One 19-ounce can pink beans, drained and rinsed
Two 4-ounce cans green chiles, drained
1 3/4 cups chicken stock or low-sodium broth
2 tablespoons chopped cilantro
Lime wedges, for serving

In a medium soup pot, heat the vegetable oil until shimmering. Season the diced chicken thighs with salt and pepper and cook over moderately high heat until browned on both sides, about 5 minutes. Add the onion and garlic and cook over moderate heat until softened, about 4 minutes. Stir in the cumin and cook until fragrant, about 1 minute.

Add the pink beans, green chiles and stock to the chicken and bring to a simmer. Cook over moderately low heat until the stew has thickened, about 10 minutes. Stir in the cilantro and season with salt and pepper. Ladle the chicken and pink bean stew into bowls and serve with lime wedges.

Serve with: White rice.

Wine: Spicy, black-fruited Malbec: 2006 Trumpeter.

See the recipe...


Monday, April 14, 2008

Cheddar Beer Soup with Croutons

Who doesn't like beer and cheese? Beer and cheese are like bacon and whipped cream (or in my case, goat cheese and peanut butter) - they go well with almost everything! As my Father-in-law would say, if you can't improve something with bacon, you could probably improve it with whipped cream. We spent the next stretch of time pondering this phrase, tossing meals around, and I can't remember one dish bacon or cream wouldn't do well on.

Now, this isn't Bacon Whipped Cream soup (Anyone want to take a moment to daydream about that for a minute?), but its just as interesting. I saw this recipe on YumSugar and immediately printed it out. You don't mess around with stuff like this.

The ingredients aren't anything fancy - absolutely easy to put together. The hardest part is all the stirring - not because I have the arm muscles of a toddler, but because it was so hard to stand over the pot, the soupygoodsmell filling my nose.

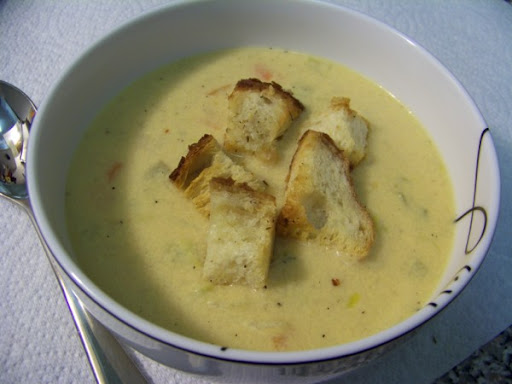
Not only dreamy soup, oh no, but delicious, crunchy croutons! Make extra, because if you get them ready before your soup is done, you'll snack on them - and I'd hate for you to run out before dinner is ready!

I would recommend making this when having guests, as I had enough beer soup after one bowl... it's kind of like butternut squash soup, in that you can't eat it forever (like goat cheese or peanut butter.) :)

Cheddar Beer Soup & Croutons
c/o YumSugar
http://yumsugar.com/user/partysugar/recipes/1042371

5 tbsp. butter
2 carrots, finely chopped
2 leeks, white and light green parts only, finely chopped
Salt and pepper
1/3 cup flour
3 cups milk
One 12-ounce bottle amber beer, such as Dos Equis
1 1/2 tablespoons Dijon mustard
10 ounces sharp cheddar cheese, grated (about 3 1/2 cups)
Croutons, for garnish, recipe follows

In a large saucepan, melt the butter over medium heat.

Add the carrots and leeks, season with salt and pepper and cook, stirring, until soft, 10 minutes.

Add the flour and cook, stirring often, for 2 minutes.

Slowly pour in the milk, whisking constantly.

Increase the heat to medium-high, add the beer and mustard and bring the soup to a boil, whisking constantly. Reduce the heat to low and simmer, whisking, until creamy and thickened, about 10 minutes.

Remove the pan from the heat. Whisk in the cheese 1 handful at a time until combined.

Season to taste with salt and pepper. Top with the croutons.

Serves 4.


Croutons

7 slices thick white bread, crusts removed
2 tbsp. melted butter
2 tbsp. extra virgin olive oil
1 tbsp. garlic, minced
1 tbsp. fresh thyme, minced
salt and pepper

Preheat the oven to 375°F.

Slice the bread into small cubes, about half-an-inch by half-an-inch.

In a large bowl toss the bread cubes with the butter, oil, garlic, thyme, salt and pepper. Toss well to coat all of the bread pieces.

Spread out on a baking sheet covered with foil.

Bake in the oven, checking often for 20-25 minutes.

Remove and let cool 5 minutes. Serve in a bowl alongside the cheddar cheese soup.

See the recipe...


Friday, April 11, 2008

Why I Never Want to Move

Ah, Friday! I don't know about you, but my work-week really flew by. Here it is Friday, and we've had nothing but leftovers all week!

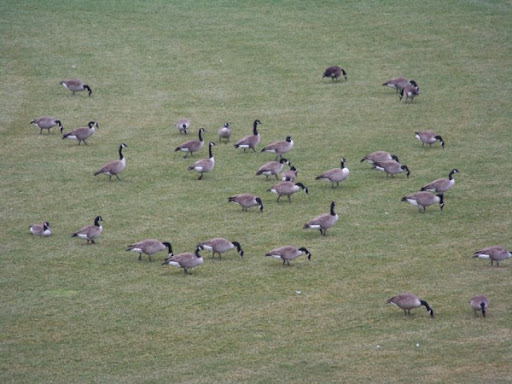
Now, the Canadian geese in our area have all paired off to raise their chicks - these photos are from February! We have a wee baseball field behind our apartment (with these views from our balcony), and every morning, at around 7:15, this flock of geese would fly in. They would spend the day flying back and forth from this field to the little pond on the other side of our complex. (I don't have a photo of that.)


Why does this matter, you ask? It doesn't, other than that it brought me great joy every morning, listening to them honk by. You see, my darling husband proposed marriage to me while we were feeding geese (almost 3 years ago, now) and I couldn't have imagined a more perfect proposal.

We were supposed to move to our new condo in March, and I am glad it fell through, not only because of the crummy housing market, but this means that I get another late-Winter of morning gooses!

No recipe today, just good wishes for a great weekend! Enjoy!

See the recipe...


Thursday, April 10, 2008

Chile-Rubbed Short Ribs with Creamy Polenta and Cotija Cheese

Over the next stretch of time, I'm going to trot out some of my older posts. In fact, I want to have something like Twilight Zone Thursday or something (I'm taking suggestions)... a nice, friendly way for us to all share those posts we've had kicking around, under the bed, lost in the couch, kicked under the oven. If there is enough interest, I'd be happy to try doing a round-up, too. Our poor neglected recipes should feel like stars, too!

Every so often, I let Dave pick out something he'd like me to make from one of his favorite cookbooks (of mine, he doesn't have any cookbooks!) They are usually all-day affairs, but I don't mind because they're always worth it in the end. This time, he chose a recipe from Bobby Flay's Mesa Grill cookbook. I want to say, too, that this was his main birthday dinner in November... but its been a while, so I'm fuzzy on the details. :)


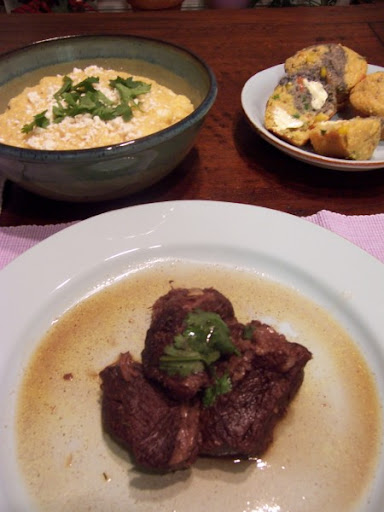
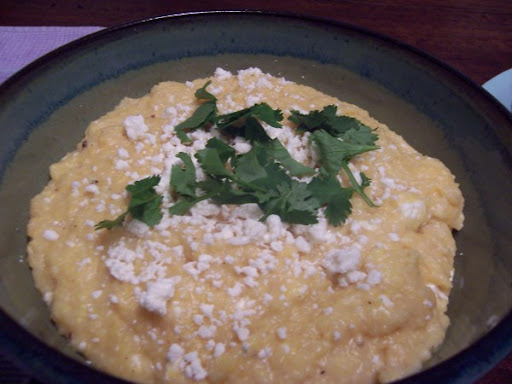
These ribs were so tender and delicious. I like that the directions call for bone removal, because ever since I had braces, I'm hesitant to eat ribs. (And corn on the cob, since I'm sharing.) Plenty of warming heat - but that's ok, because the creamy polenta more than made up for it. The muffins you see in the top picture were so good, they're getting their own post - I promise!

While start-to-finish this dinner took a few hours, it really wasn't difficult. The ribs got a nice spice rub, seared, and then popped in the oven. While they finished, I pulled the polenta together. Super easy!

So. Let me know if you're interesting in playing along with me, and I'll get something going! (And if you have any clever naming ideas, send them my way!)


Chile-Rubbed Short Ribs with Creamy Polenta and Cotija Cheese
c/o Bobby Flay's Mesa Grill Cookbook: Explosive Flavors from the Southwestern Kitchen,

3 tablespoons New Mexico red chile powder
Kosher salt
2 teaspoons ground cinnamon, preferably Mexican cinnamon (canela)
2 teaspoons coarsely ground black pepper
3 pounds bone-in short ribs
½ canola oil, plus extra as needed
4 cloves garlic, peeled
1 medium Spanish onion, coarsely chopped
2 medium carrots, peeled and coarsely chopped
1 stalk celery, coarsely chopped
1 cup red wine
4 cups low-sodium chicken stock
6 sprigs fresh thyme
Freshly ground black pepper
Creamy Polenta with Cotija (recipe follows)

Preheat the oven to 325° F.

Mix together the chile powder, 2 teaspoons salt, the cinnamon and the coarsely ground black pepper in a small bowl. Lay the ribs on a baking sheet and season one side with the spice mixture, rubbing the mixture in so that it adheres to the meat.

Heat the oil in a large ovenproof Dutch oven over high heat until it shimmers. Working in batches, place the ribs in a single layer, rub side down, in the oil and cook until a crust has formed and the ribs are golden brown. Turn the ribs over and cook until the second side is golden brown. Remove to a plate and repeat with the remaining ribs, adding more oil if needed.

Remove all but 2 tablespoons of the fat in the pan and add the garlic, onion, carrots, and celery and cook until golden brown and caramelized, 6 to 7 minutes. Add the wine and boil until nearly reduced, 2 to 3 minutes. Add the stock and bring to a simmer.

Return the ribs to the pan along with the thyme and bring to a simmer. Place the lid on the pan and place it in the oven. Cook until the meat is tender and falling off the bone, 2 to 2 ½ hours.

Carefully remove the ribs to a large plate and let cool slightly. When cool enough to handle, remove the meat from the bones and discard the bones.

Strain the sauce into a medium saucepan and return it to the stove over high heat. Bring the sauce to a boil and continue cooking, stirring occasionally, until reduced to a sauce consistency, 10 to 15 minutes. Season with salt and freshly ground black pepper and discard the thyme sprigs. Return the ribs to the pan to reheat.

Serve over creamy polenta with cotija in large, shallow bowls.

Serves 4.


Creamy Polenta with Cotija
c/o Bobby Flay's Mesa Grill Cookbook: Explosive Flavors from the Southwestern Kitchen,

5 cups low-sodium chicken stock
Kosher salt
1 cup medium-grind white cornmeal
8 tablespoons (1 stick) unsalted butter, cut into pieces
¼ cup heavy cream
1/3 cup grated cotija cheese
Freshly ground black pepper

Combine the stock and two teaspoons salt in a large saucepan and bring to a boil over high heat. Add the cornmeal in a fine stream, whisking constantly with a wire whisk. Once all the cornmeal has been added, reduce the heat to low and cover the pan. Stir the mixture, using a wooden spoon, every 5 minutes and continue cooking until all the liquid has been absorbed and the mixture is very creamy, 25 to 30 minutes.

Remove from the heat and stir in the butter, heavy cream, and cotija cheese until combined; season with salt and pepper.

Serves 4.

See the recipe...