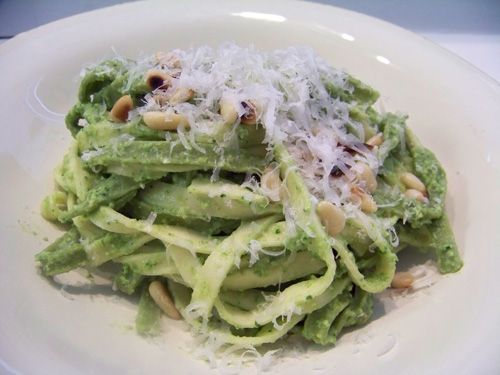
 I hate to say that we had this a month ago, at least. I'm even a little sheepish about it. I have a really strong affection to this pesto. Stupid simple to pull together and it was incredibly versatile. I know Ruth will get a laugh at this - yet another pesto for Presto Pasta Night! :)
Found in Heidi Swanson's Super Natural Cooking, I chose this pasta dish because I really wanted to showcase the fresh vegetables I found at the market - asparagus and peas. If you are familiar with this recipe, you'll know that it doesn't call for fresh peas... but I had them, and they were green, and I wanted to eat them, so in they went with the asparagus to blanch.
Really tasty. Happened to have about a pint of fresh peas from the market, so I tossed those in to blanch with the asparagus. I did cheat and buy my pasta this time. Isn't it weird, how foreign something can be until you're used to it? At this point, I can't imagine not making my own pasta - so long as it isn't anything shaped - which I guess is kinda simple, but still. We have the attachment for macaroni, but my one attempt was a disaster. Pasta sheets it shall be. :)
Anyway, the combination of egg and spinach pasta was visually interesting and it tasted quite nice, too. The spinach pasta added an element we aren't normally used to - so much so that I want to try to make my own spinach pasta... but that is a story for another post.
The asparagus, spinach and peas played really nicely together in the puree. The flavors blended, leaving them all to be equal players - no one flavor stood among the rest. I think I added a little more than half a lemon, but I really enjoy the extra bite of citrus in pesto.
Because I'd added a good cup of peas to the mix, I ended up with quite a lot of puree. I followed Heidi's suggestion in the book and used it everywhere I could: in sandwiches, other recipes calling for pesto, and on pizza.... all in a 10 day period. We even had the pesto pizza TWICE in that time. Why? Because the pesto, on a pizza, with ricotta, goat cheese, or mozzarella, is amazing - and we tried it each way. You'd think that having the same flavor so many times would get old, but it didn't. Our socks were that knocked off.
I'm sorry to share this past the asparagus season, but if you're like me a cheat a little and get them at other times in the season, please bookmark this recipe and give it a try. In pasta, it is surprisingly creamy, smooth and tart. On pizza, it is even better.
Straw and Hay Fettuccine Tangle with Spring Asparagus Puree
c/o Super Natural Cooking, by Heidi Swanson
http://www.amazon.com/Super-Natural-Cooking-Incorporate-Ingredients/dp/1587612755/ref=pd_bbs_sr_1?ie=UTF8&s=books&qid=1214342419&sr=1-1
The folate-rich asparagus and spinach puree can be made ahead of time; store it in the refrigerator in a jar topped with a layer of olive oil. It’s also great slathered on a grilled vegetable Panini, as a swirl in a simple potato soup, or as a sauce for pizza.
Spring Asparagus Puree
1 bunch asparagus spears, trimmed and halved crosswise
3 handfuls baby spinach leaves
2 cloves garlic
1 cup freshly grated Parmesan cheese, plus more for topping
1 cup toasted pine nuts
¼ cup extra-virgin olive oil, plus more for topping
Juice of ½ lemon
½ teaspoon fine-grain sea salt
4 ounces dried spinach fettuccine, or 6 ounces fresh
4 ounces dried egg fettuccine, or 6 ounces fresh
Bring two pots of water to a rolling boil, one large and one medium. You’ll use the large one to cook the pasta and the medium one to blanch the asparagus.
To make the asparagus puree, salt the asparagus water and drop the spears into the pot. Cook for 2 to 3 minutes, or until the spears are bright green and barely tender. Drain and transfer to a food processor (preferably) or a blender. Add the spinach, garlic, the 1 cup of Parmesan, and ¾ cup of the pine nuts. Puree and, with the motor running, drizzle the ¼ cup olive oil until a paste forms. It should be the loose consistency of pesto; if too thick, thin it with a bit of the pasta water. Add the lemon juice and salt, then taste and adjust the seasoning.
Salt the pasta water well and cook the pasta until just tender; you’ll need less time for fresh pasta, more for dried. Drain and toss immediately with 1 cup of the asparagus puree, stirring in more afterward depending on how heavily coated you like your pasta. Serve sprinkled with the remaining ¼ cup toasted pine nuts, a dusting of Parmesan, and a quick drizzle of extra-virgin olive oil.
Serves 4 to 6.
Thursday, July 31, 2008
Straw and Hay Fettuccine Tangle with Spring Asparagus Puree
Posted by
Katie B.
at
4:50 PM
9
comments
![]()
Labels: asparagus, pasta, peas, pesto, presto pasta night, spinach
Wednesday, July 30, 2008
Daring Bakers July: You Mean I Can't Have Cake for Dinner?
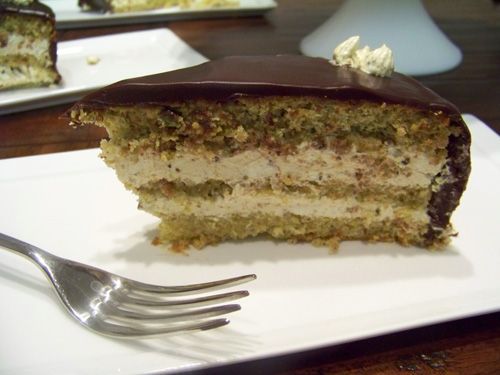 This Pistachio Gateau with Praline Buttercream has a power. The Power of Magnetic Deliciousness. I took my time this past weekend preparing it - and didn't cut into it until Monday night with friends. But yesterday? I spent almost my entire Tuesday thinking about this cake. I wanted to have it for dinner. And then again for dessert. Forking a bite was the first thing I did when I got home. (This obsession is starting to sound a little weird, isn't it?) I am not alone, however. A bite of cake was also on my husband's short list upon arriving home - I got a smooch and then off he went to the cake. At least he got it in the right order. ;)
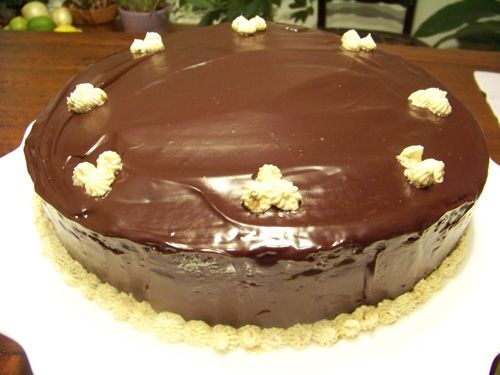 I started this challenge this past Saturday night with the cake. I only have 8-inch cake pans, so I opted to use my 9-inch springform pan instead. The Daring Bakers that braved this challenge earlier in the month suggested using a round of parchment paper in the bottom, so I thought that the springform action would be an added help. I used pistachios instead of hazelnuts (the hazels were twice the cost for half the amount of shelled pistachios at the store - and I want to marry pistachios.) I was more than a little nervous that the cake wouldn't turn out - because the way the instructions read, it seems to indicate that we are to mix the nut flour into the butter - when it really means to fold it directly into the batter... so I ended up trying to delicately fold in the dense buttery nut meal into my light and fluffy egg mixture... A moment of panic, indeed, but it worked out in the end - the genoise seemed no worse for wear and baked up nicely. Cooled and wrapped up, it spend the night in the fridge.
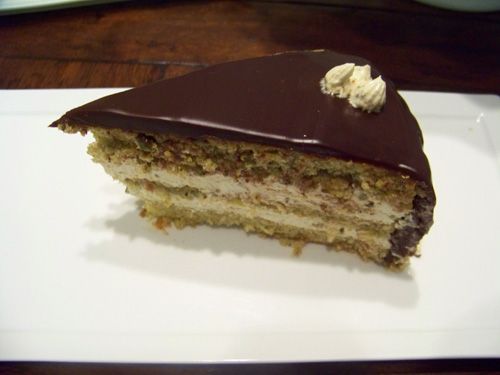 Sunday afternoon, I started with the praline - pistachio, of course. Such a simple combination of sugar and nuts created a most delicious brittle. (I even made a second batch to snack on!!) While it cooled, I prepared the buttercream (with its three sticks of butter!!!) I was lucky in that it came together easily for me - I've read countless horror stories of failed buttercreams... I made sure to have extra of everything, just in case. Layering the cake was a little of a catastrophe, because I mangled the middle one - the center of the cake is mostly crumbly bits... I figured if I doused it with enough of the sugar syrup, it would just bond together, right? I'd like to think that worked - and if I slice the cake when it is still cold, it mostly stays put... but whatever - it all tastes the same, crumbly or not! :)
Final assembly: glaze, ganache, garnish. I am a big fan of glazing before ganache-ing. It acts like something of a crumb coat, allowing the chocolate to flow a little easier - which is terrific. I don't often ganache a cake, and I'm starting to wonder why. I find it remarkably easier than icing a cake, and it looks so spectacular in the end, too. Consider me a convert. I have also never ever not once used a piping bag and tips to decorate a cake. I own a set, yes, but I'd never used it. I picked a basic star tip and as you can see, went with a basic dot pattern. If this has been any other cake (not a challenge) and if it was only Dave and I eating it (instead of having friends over), I might have been a little more bold... but I didn't want it to be a major flop. I also prefer spare simplicity, so I was happy with the result. I considered using some of the second batch of brittle as garnish, but didn't want the hardness of it to detract from the cake itself. Texture issues and all that. Into the fridge to wait for Monday night.
Soon enough, it was time to have some cake! I boldly cut us all giant pieces and we all dug in. I don't think a single one of us finished our slice. Smaller is certainly better. This cake is rich rich rich and a little goes a long way. A long way I'm happy to take for breakfast, lunch or dinner! The buttercream is by far my favorite part. I really enjoyed the flecks of nut/crunch in it and it provided just the right amount of both. The cake was moist and light. I can't sing the praises far or wide enough for this cake. I am considering buying the book it is from: Great Cakes by Carole Walters - because if this recipe is any indication, I will love trying the rest!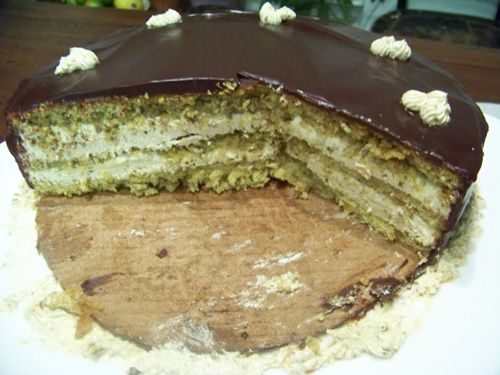 I really enjoyed making this cake - all eleventy billing elements. I gleefully whipped, frothed, caramelized and folded every last bit. I skipped off with tastings of every stage for Dave and my excitement grew with each accomplished step. Not only that, but I never felt overwhelmed by this challenge - which is new for me. Yes, there were a lot of moving parts - and some of them were new - but I felt like, if I just followed them in order, took them as an individual piece and not a giant behemoth of a cake, I could do it. I did, and I loved it.
Thanks to the lovely Chris at Mele Cotte for a delicious challenge. Head on over to her post for the recipe and then pop over to the Daring Bakers Blogroll for more inspiration!
Posted by
Katie B.
at
10:01 AM
19
comments
![]()
Labels: Daring Bakers, ganache, grand marnier, pistachio, swiss buttercream
Monday, July 28, 2008
HHDD #21: The Tiramisu That Won Him Over
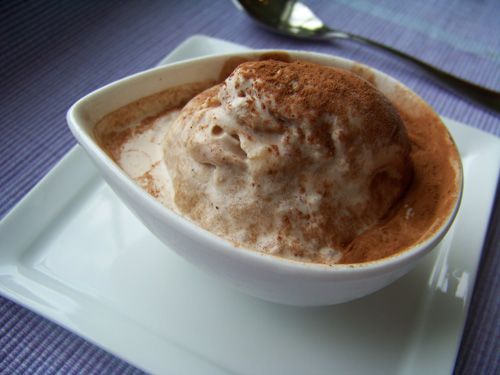 I love tiramisu. Love it. Whenever I go into Whole Foods, I make sure to include a little square in my purchase. I adore the creamy mascarpone, the coffee and liqueur-soaked lady fingers, and the barest of dustings of cocoa powder. Tiramisu might be the one dessert I eat slowly, savoring each spoonful (vs. greedily stuffing my face.)
How I managed to marry a man that doesn't also share the same love of tiramisu is beyond me. He'll choke it down, sure, but it doesn't sit on quite the same pedestal. Silly man. When Alexandra announced this round of HHDD, I was both elated and worried. I knew I would make it - I knew it - but I wasn't thrilled for the mournful sighs from the hubs ("Can't you make a dessert I like??!?!?!") . How could I make it in a way he would like it, nay, love it??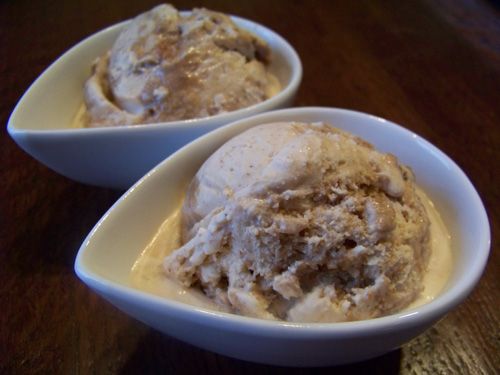 I was staring at the Donna Hay recipe Alexandra provided... that stare one uses when they don't really see the object of their staring?... and it clicked - I would turn the mascarpone cream into ice cream! I would blend the soaked lady fingers into it! It would be brilliant! My brain clicked back and I set to work. I decided to use the recipe provided, and tweak another D. Hay recipe for mascarpone ice cream - I figured, if I'm going to do this, I'm going the whole Donna Hay Way.
I was sneaky about it, for sure. I didn't tell Dave what I was up to. I didn't even explain why I was buying the lady fingers very well, "O, I need those for ice cream." Such is his trust in me, however, he didn't even ask for more information. Maybe it isn't trust, but he probably knows by now that he doesn't really need to know. He just eats what I make and is happy - that's enough for him. I made the base Saturday morning and poured it into the machine. Thirty minutes later, and it still hadn't reached the soft-serve stage... cold, for sure, but in no way thick enough to pop into the freezer. I let it go another 20 minutes, thinking more mixing might help. Nope - the opposite happened... my mix was back where I started, cold, but completely liquid. I considered throwing in the towel. Instead, I poured it out of the ice cream bowl and into two containers. I hadn't realized just how much was in the machine - easily twice what I normally run. Perhaps if I let the bowl refreeze and then just process half at a time? Bingo - success!
Meanwhile, I soaked the lady fingers in a mix of espresso and coffee liqueur. The delay in getting the ice cream processed meant that the finished product was a little soggy - but it still mixed into the mascarpone ice cream nicely.
Maybe too nicely? As you can see, there aren't too many "chunks" of soaked finger - more like swirls. I contend that this is part of the reason Dave enjoyed the ice cream as much as he did. You see, Dave doesn't drink coffee. Doesn't like it, not the smell, not the taste. The benefit of having the fingers so soaked as to be to blended in dispersed the flavor enough that it was never overwhelmingly coffee-flavored. Each bite was a brilliant blend of tiramisu - I think this might always be the method of production in our home going forward. I get my guilty indulgence, and my dear husband can enjoy it with me - except - now I have to share.
Tiramisu
c/o Modern Classics Book 2 by Donna Hay
via Addicted Sweet Tooth
http://addictedsweettooth.net/?p=277
1/2 cup (4 fl oz) strong espresso coffee
1/2 cup (4 fl oz) coffee liqueur
16 sponge finger biscuits, halved widthwise
cocoa powder for dusting
filling
1 1/4 cups (310 g/10 1/2 oz) mascarpone
1 1/2 cups (12 fl oz) (single or pouring) cream
3 tablespoons icing (confectioner’s) sugar, sifted
To make the filling, place the mascarpone, cream and icing sugar in a bowl and whisk until light and creamy. Set aside.
Place the coffee and liqueur in a small bowl and stir to combine. Quickly dip both sides of half the biscuit halves in the coffee mixture and place in 4 glasses or small bowls. Top with half the filling. Dip the remaining biscuit halves, place on top of the cream layer and spoon over the remaining filling. Dust heavily with cocoa and refrigerate until required.
Serves 4.
Mascarpone Ice Cream
c/o Bear Necessities
http://brookes-bearnecessities.blogspot.com/2007/05/cinnamon-marscapone-ice-cream.html
1 1/2 cups sugar
1 3/4 cups water
2 tsp cinnamon
14oz mascarpone
1/2 cup cream
1. Place the sugar and water in a saucepan over low heat and stir until sugar dissolves. Simmer for 3 minutes, then remove from heat, add the cinnamon and leave syrup to cool.
2. Mix the syrup with mascarpone and cream. Place in an ice cream maker and follow manufacturer's instructions until ice cream is thick and scoopable.
Posted by
Katie B.
at
2:04 PM
8
comments
![]()
Labels: boozy dessert goodness, HHDD, mascarpone, tiramisu
Sunday, July 27, 2008
Sher's Scallion-Chicken Noodles
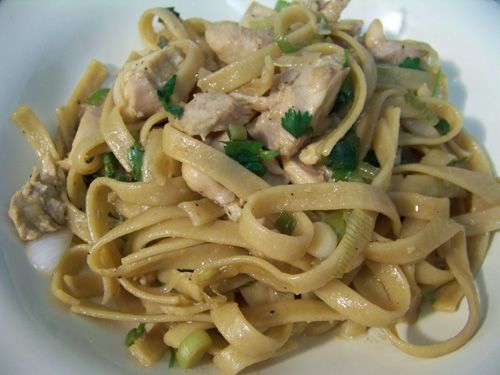 O, the comforting power of food. What could be a more perfect tribute to our friend Sher than to collect and make something from her blog, What Did You Eat? as a show of love and support. Her kind words touched so many of us, and the way her blog was written, I always felt like I'd been welcomed into her home with open arms. You know how you can feel like you just know someone - even someone you've never met? Someone so charming and wholesome and organic of spirit, they allow you to feel as though you've been friends forever? Sher was like that. And I wish I'd told her how happy I was to have known her, even if only through the internet.
Sher belonged to many groups. I looked forward to her dishes for Presto Pasta Night, and I felt like I always had something to learn from her posts to Weekend Herb Blogging. What charmed me, too, were her Weekend Cat Blogging posts, and I eagerly sought them out - often the first blog I'd read on the weekend. A fellow Daring Baker, she brought a spirit to our group that will be greatly missed. I am sure I've left a group or two out, but I think you get my point - she was an active member of almost every aspect of the food community, and will be sorely missed.
Once Mary and Kalyn put out the call to choose a recipe of Sher's, I immediately chose these scallion-chicken noodles. In fact, I'd had the dish bookmarked since she first shared it with us! Such a simple preparation and yet so delicious. The fragrance alone would knock your socks off. I totally agree with her one and only grievance with the meal - that she had to share it!! I too would have loved to keep it all to myself! This is a curl up on the couch under a blanket pasta dish, especially on a dreary day, as the ginger and cilantro are bright and warming.
So too, was Sher. Bright and warming and remembered today across the globe. Her kindness, generosity and friendship will live on.
Scallion-Chicken Noodles
c/o Sher of What Did You Eat?
http://whatdidyoueat.typepad.com/what_did_you_eat/2008/05/ppn-scallion-ch.html
1/2 pound skinless, boneless chicken thighs
3/4 pound fresh Chinese noodles (or dry linguine)
1/4 cup peanut oil
1 cup finely chopped scallions
1 tablespoon finely grated fresh ginger
2 tablespoons soy sauce
1 teaspoon Asian sesame oil
Pinch of sugar
Salt and freshly ground pepper
1/4 cup finely chopped cilantro leaves
Bring a saucepan of water to a boil. Add the chicken thighs and bring back to a boil. Remove from the heat, cover and let stand until the chicken is cooked through, about 15 minutes. Drain the chicken and cut it into 1-inch pieces.
Meanwhile, in a large pot of boiling salted water, cook the linguine until tender, 12 minutes. Drain, shaking out the excess water.
Wipe out the pot. Add the peanut oil and heat until shimmering. Add the scallions and ginger and cook over moderately low heat until fragrant, about 1 minute. Add the linguine and chicken along with the soy sauce, sesame oil, sugar and a generous pinch each of salt and pepper. Cook over moderately high heat, tossing, until the noodles are coated and heated through, about 1 minute. Toss in the cilantro, transfer to bowls and serve.
Posted by
Katie B.
at
11:01 AM
3
comments
![]()
Labels: chicken, noodles, scallions, Sher, What did you Eat
Wednesday, July 23, 2008
Crispy Black Bean Cakes with Sour Cream and Avocado
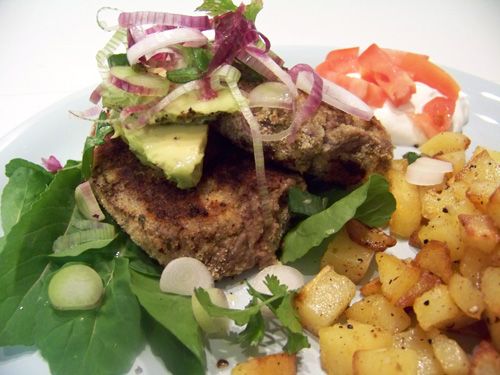 I don't know what it is about the Summer, but I feel like time just slips away. I can pin some of it down: busy times at work, lazing by the pool, a dozen movies from Netflix. I just don't seem to notice the time. I don't know if that makes sense... but I am having a hard time wrapping my head around the last 10 days. Why? Because it feels like it was about 20 minutes. Can it really be so long since I've blogged? Crazy.
We are big fans of little veggie cakes. Ever since I tried my first meatless burger at home, we've been big fans. Variations are limitless and they are so easy to toss together (because odds are, you have most of the ingredients in your pantry already!)
What sets these black bean cakes apart is their crusty outsides/creamy interiors. Genius. Mind you, it calls for 12 cakes and we probably ended up with 6. C'est la vie. The mix out of the fopo is more than a little sticky, so keep a bowl of cold water nearby to wet your hands slightly - it helps, I promise.
Once fried and drained, I served the cakes with a little arugula, scallions, and avocados, as directed. You'll see the sour cream and tomatoes on the side - the husband isn't a fan of either, so I didn't mess with dolloping on both. I sauteed some cubed market potatoes to go with, on a lark, and the combo really worked. Not only that, but the variety of colors on the plate really made me happy.
Crispy Black Bean Cakes with Sour Cream and Avocado
c/o Melissa Rubel in Food & Wine Magazine, April 2008
http://www.foodandwine.com/recipes/crispy-black-bean-cakes-with-sour-cream-and-avocado
These pan-fried cakes are crispy on the outside (thanks to a thin coating of bread crumbs) and creamy in the center. They make an excellent vegetarian meal, especially alongside a green salad.
2 tablespoons vegetable oil, plus more for frying
1 small onion, cut into 1/4-inch dice
1 large garlic clove, minced
3/4 teaspoon ground cumin
1/4 teaspoon cayenne
Two 15-ounce cans black beans, drained
1 1/4 cups plain dry bread crumbs
Kosher salt and freshly ground pepper
1/3 cup all-purpose flour
2 large eggs, beaten
Sour cream, avocado, scallions and lime wedges, for serving
In a medium skillet, heat the 2 tablespoons of vegetable oil. Add the onion and garlic and cook over moderate heat just until softened, about 3 minutes. Add the cumin and cayenne and cook until fragrant, about 1 minute. Scrape the onion mixture into the bowl of a food processor. Add 1 1/2 cups of the beans and pulse until the mixture is finely chopped but not smooth. Scrape the mixture into a medium bowl. Mix in the remaining whole beans and 1/2 cup of the bread crumbs and season with salt and pepper. Form the mixture into twelve 1/4-cup patties, about 1/2 inch thick.
Put the flour, beaten eggs and the remaining 3/4 cup of bread crumbs into 3 shallow bowls. Dust each black bean cake with the flour, tapping off the excess. Dip the cakes in the egg and then in the bread crumbs, pressing so that the bread crumbs adhere.
In a very large skillet, heat 1/8 inch of oil until shimmering. Add the cakes and fry over moderate heat until golden brown, about 2 minutes per side. Drain on paper towels. Serve the black bean cakes with sour cream, avocado, scallions and lime wedges.
Wine: Soft, plummy Merlot: 2005 Mia’s Playground.
Posted by
Katie B.
at
2:47 PM
2
comments
![]()
Labels: black bean cakes, Food and Wine magazine, vegetarian
Sunday, July 13, 2008
Lamb Sausage with Lentils and Sauteed Pears
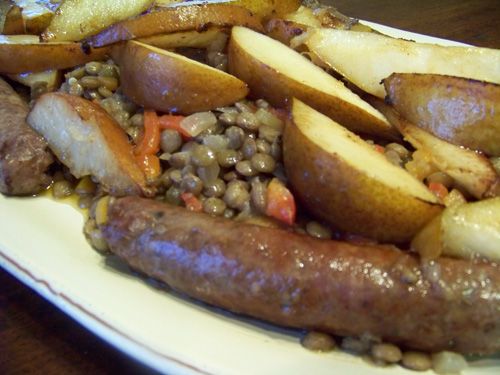 I think this meal is going to become my new go-to dinner for guests. For a while, anytime we had anyone new over, we served this steak. Sure, that goat-cheese topped filet was awesome, but this lamb, lentil and pear dish wins. Dave and I had this for dinner and had enough leftover for lunch the next day. I'd even considered ways to finagle Dave's lunch helping away from him so I could have it all to myself. Greedy? Sure. But make this and you'll understand why.
Not only is the marriage of the lamb, lentils and pears a thing of beauty, it is also a lot easier. Yes, the steak was dead simple, but it had so many things going on WITH it (the mashed potatoes, asparagus, and Bearnaise) - that this new favorite simply doesn't. What's more ridiculous? There isn't a darn thing in the ingredient list that's tricky. You'll either have it at home or know where to get it. Although, now that I've written that out, it occurs to me that lamb sausage might not be as easy to find universally. I picked ours up at a local farmers market on a whim. Feel free to substitute what you have.
 I will say that I soaked my lentils ahead of time. I then drained and covered them and went to the movies. I had been worried that doing so would harm the texture, but it didn't. I simply moved on to the next step once we got home. You know what's lovely about lentils? Packed with protein. Packed. Not only that, but loads of fiber and B vitamins and lentils are good for your heart. It's lovely to know that something so delicious is also incredibly nutritious! If you're interested in more protein-rich recipes, pop over to the Art of Cooking Indian Food for Sangeeth's round-up!
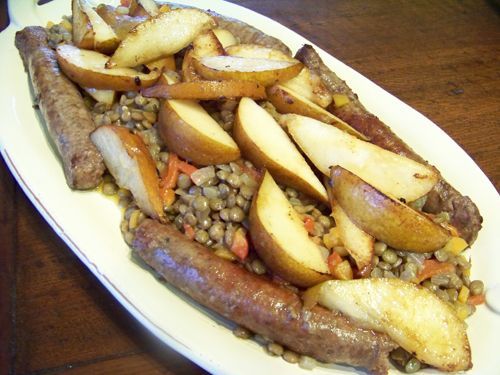 I had a red bell pepper in my fridge, so I roasted and sliced it instead of buying a jar of piquillos. I don't know how different the end result would be, but I was thrilled with how it turned out, and when I make this again, I'll probably do it the same way. In fact, I'll probably make double, so I can squirrel some away in the freezer.
Now, for those of you that don't like to mix fruit in savory way into your dinner, please try to overlook that aspect. Dave didn't seem too enthusiastic about it at first blush, either, but gobbled this dinner up, pears and all. The recipe calls for the pears to be cut into eighths, but once I had them that way, they seemed too big. I sliced all the larger eighths in half, which got them closer in size to the sausages (and easier to eat!)
I cannot tell you enough how lovely this meal was. In the photos, it certainly looks like a rich, heavy Winter meal - don't let that deter you. Each bite was a joy, whether you had a bit of everything on your fork or not. The pears were soft and juicy and mingled brilliantly with the heartiness of the lentils and bite of the sausage. I can't wait to make it again.
Shall I set a place for you?
Lamb Sausage with Lentils and Sauteed Pears
c/o Food & Wine Magazine, May 2008
http://www.foodandwine.com/recipes/lamb-sausage-with-lentils-and-sauteed-pears
One of Defne Koryürek’s favorite homemade sausages includes beef, lamb, red peppers and garlic; she loves eating it alongside a creamy salad of lentils, roasted peppers and sautéed pears. The recipe is also delicious when prepared with spicy, rich merguez sausage.
2 cups brown lentils (14 ounces)
4 cups boiling water
3/4 cup extra-virgin olive oil
2 carrots, diced
1 onion, diced
1 celery rib, diced
Salt and freshly ground black pepper
3 tablespoons cider vinegar
1 cup roasted red peppers (8 ounces), preferably piquillo, cut into thin strips
1 1/4 pounds merguez sausage
2 ripe Bartlett pears, cored and cut into eighths
In a large heatproof bowl, cover the lentils with the boiling water and let stand for 30 minutes. Drain.
In a large saucepan, heat 2 tablespoons of the olive oil. Add the diced carrots, onion and celery and cook over moderate heat, stirring occasionally, until softened, about 8 minutes. Add the lentils and 1 1/2 cups of water and season with salt and pepper. Cover and cook over low heat until the lentils are just tender and the liquid is absorbed, about 20 minutes. Stir in 1/2 cup of the olive oil, the cider vinegar and the roasted red peppers and season with salt and pepper. Transfer the lentil mixture to a serving platter.
In a large skillet, heat the remaining 2 tablespoons of olive oil. Add the merguez sausage and cook over moderate heat, turning occasionally, until browned and cooked through, about 8 minutes. Arrange the sausages around the lentils and pour over any accumulated juices.
Return the skillet to high heat. Add the pears and cook, turning once, until lightly browned, about 2 minutes. Transfer to the platter and serve right away.
Make ahead: The cooked lentils can be refrigerated overnight. Reheat gently before serving.
Wine: The smoky, substantial red wines of Spain’s Jumilla region seem as though they were designed to go with spicy sausages like merguez, making them ideal partners for this rustic dish. Look for the 2005 Finca Luzón, full of blackberry fruit, or the plummy 2005 Mad Dogs & Englishmen from Bodegas y Viñedos de Murcia.
See the recipe...
Posted by
Katie B.
at
4:56 PM
10
comments
![]()
Labels: Food and Wine magazine, lamb sausage, lentils, pears, protein-rich
Tuesday, July 8, 2008
TwD: Snickery Bar Flashback
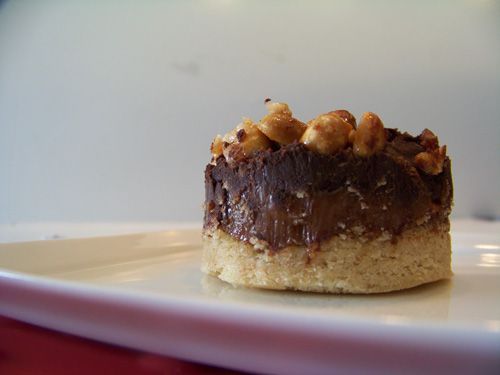 This week's Tuesday with Dorie, hosted by South in Your Mouth, is a beautiful blueberry pie.
Neither of my photos look particularly blue or berry-y, so let me explain. I'm still traumatized from my last blueberry pie experience. I just couldn't brave it. I know, I'm a sissy. Instead, I went into the TwD archives and found these rocking Snickery Bars, previously hosted by Dinner & Dessert.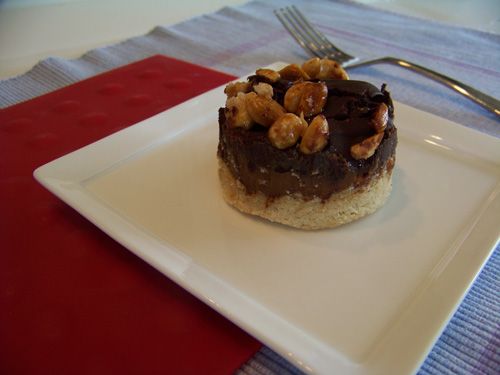 I generally love snickers bars. Especially when they are in their small, bite-sized form. That way, I can have three little nibbles and still feel like I haven't abandoned my better eating habits (see how I dodged the word diet?) Would I still feel the same way about a pan full of them? I did - but only because I could take half of them to work! These bars are nicely sweet, but overly rich - I could only get through a little bit before I was grasping for some cold milk. Which isn't a bad thing, mind you, because at least then I'm stopping myself from shoveling them ALL into my mouth.
I had never used dulce de leche before (and frankly, I still can't pronounce it) and I was pleasantly surprised by it. I know there are recipes to make it at home (I bought mine) that involve sweetened condensed milk, which is already pretty thick. I hadn't expected the dulce de leche to be as thick as it was... in my mind, it was runny, like butterscotch sauce, and I couldn't figure out how it would stay in bar form once I cut them up. Silly me! DDL is thick and easily spreadable. I had no problems smearing it atop the cookie base (which in itself was sweet and dainty.) This recipe wasn't difficult or particularly time consuming, and I think it would be a perfect dessert for a bbq or a bake sale (so long as it isn't too too hot out.)
As we don't post the recipes individually anymore, please click through to Erin's blog for the instructions. You won't be sorry.
Posted by
Katie B.
at
9:30 AM
19
comments
![]()
Labels: chocolate, dulce de leche, peanuts, shortbread, Tuesdays with Dorie
Monday, July 7, 2008
Taste & Create Seasonal: Grilling Cheese-Filled Goodness
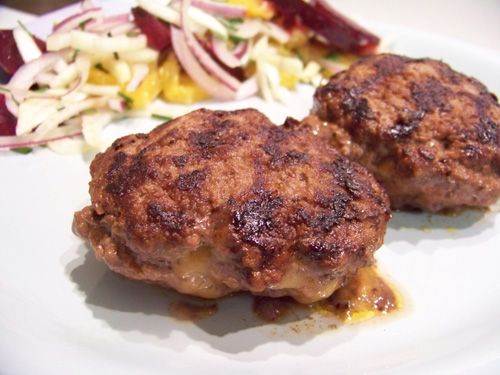 And here I didn't think the typical made-at-home burger could get any better! For this round of Taste & Create (a special seasonal grilling version), I was paired with the event's creator and lovely hostess Nicole of For the Love of Food. I'm a big fan of Taste & Create, and I was tickled to try a grilling swap - even though I don't actually own a grill (grill pans and broiling were both allowed!)
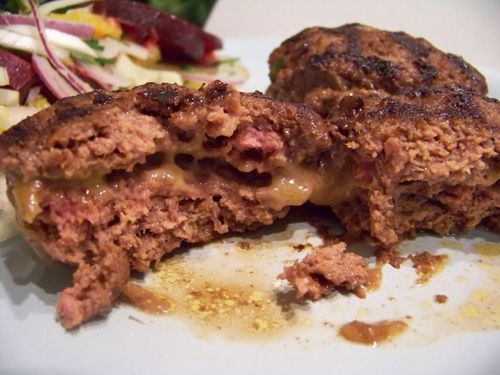 Ultimately, I chose her Cheese-Stuffed Burgers. Why? Because I'd never stuffed a burger before, and I was intrigued by the inclusion of jam in the mix. You heard me. Jam. In. The. Mix. Now, hers specifically calls for apricot, but I didn't have any and couldn't rationalize buying a whole jar for a half-teaspoon. So I used what I had - peach - and I probably used a full teaspoon. I wasn't measuring, but it seemed like a bigger blob. My other modification was to use ground bison instead of beef - both leaner and more humanely raised, more often than not. I was at Wegmans for my shopping, and while I don't normally get my meats there, I also wasn't in the mood for a special trip to my butcher. Lazy, a little, but I tried to swap out smartly. These burgers are so tasty! I had a little bit of cheese seepage (now that's a sentence I bet you didn't expect), but overall, the cheese stayed where it was supposed to. The burgers were moist and flavorful (and not the least bit jammy.) I skipped a bun, but Dave doctored a sub roll, and he liked it a lot.
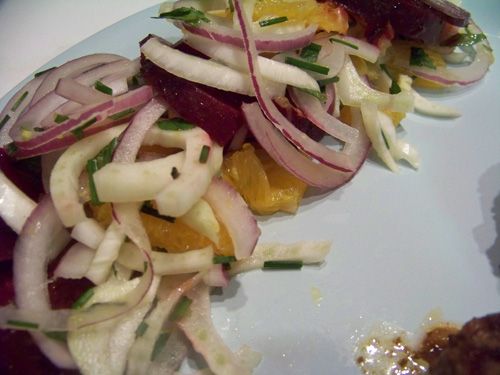 We didn't have dinner until close to 9:30 last night. We'd had a late, large breakfast and shared a pretzel at the mall after our movie (Wall-E - go see it!), so we just weren't hungry earlier. While Dave talked to his parents on the phone, I mixed and filled the patties. I also prepared this little salad of roasted beets, fennel and orange. I wasn't in my right mind, it seems, because it was a salad entirely composed of things Dave doesn't like. See, we received beets in our CSA last week... and we tried beets last summer and decided we didn't like them. I was determined to give them another go and found this recipe in Fresh Every Day. It looked good to me... I just wasn't thinking. In the end, it all worked out, because something about all of those ingredients really clicked, and Dave liked it. We even had the extra for lunch today. Whew, saved!
This was a lovely summer grilling dinner. A delicious, easily-prepared burger, alongside a salad that surprised us in its goodness.
Cheese-Stuffed Burgers
c/o Nicole at For the Love of Food
http://forfood.rezimo.com/?p=614
1/4 Cup finely shredded Cheddar Cheese
1/4 Cup fresh finely shredded Parmesan (originally calls for Gruyere)
1 lb. 90% lean Ground Beef (ground Sirloin)
*1 Tablespoon Soy Sauce
*1/8 teaspoon Fructose (or Sugar)
*1/2 teaspoon Fructose-based Apricot preserves
1 1/2 teaspoons Paprika
1/4 teaspoon Pepper
*Soy Sauce, Fructose, and Apricot preserve can be substituted with 1 tablespoons of Worcestershire sauce
Preheat your grill to medium-high or preheat your broiler.
Combine the cheeses in a small bowl and set aside.
In a large bowl combine the remaining ingredients until the spices are evenly distributed. Separate the mixture into 8 same-size balls of meat. Flatten each into a nice round thin patty.
Place 2 tablespoons of the cheese mixture in the middle of 4 of the patties, leaving 1/2 an inch free from the edge. Top those 4 patties each with a cheese-less patty and press down the edges to seal in the cheese.
To Grill:
Grill over medium-high heat for about 4 minutes on each side. It is recommended not to press the burgers while they are cooking or the cheese will ooze out.
To Broil:
Place the patties on a rack in the oven and broil the patties as close to the top as possible without touching the heat source directly. Broil for 4 minutes on each side.
And:
Roasted Beet Salad with Oranges, Fennel, and Mint
c/o Fresh Every Day: More Great Recipes from Fosters Market, by Sara Foster
http://www.amazon.com/Fresh-Every-Day-Recipes-Fosters/dp/1400052858
Serves 6 to 8
6 medium beets (red, golden or any other variety, or a combination), trimmed of greens and washed well
Juice of 1 orange
1/4 cup olive oil
2 tablespoons balsamic vinegar
2 tablespoons maple syrup
Sea salt and freshly ground black pepper to taste
3 navel oranges, peeled and sliced into 1/2-inch rounds
1 large fennel bulb, halved, cored and sliced into thin slivers
1 small red onion, sliced into very thin rounds
3 ounces crumbled goat cheese (about 3/4 cup)
2 tablespoons chopped fresh chives
2 tablespoons chopped fresh mint leaves
Preheat the oven to 400°F.
Place the beets on a baking sheet with sides or in a large, glass baking dish. If you're using a combination of red and golden beets, separate them to prevent the red from bleeding onto the golden. Pour the orange juice, olive oil, vinegar, maple syrup and 1/4 cup of water over the beets and season with salt and pepper. Cover the baking sheet tightly with foil and roast the beets until they're tender when pierced with a knife, 40 to 45 minutes. Uncover and let the beets cool to room temperature. Reserve the cooking liquid.
Peel the beets and slice them into 1/4-inch rounds. Arrange the beets, oranges, fennel and onion on a platter or on individual plates, placing contrasting colors and textures next to one another.
Pour the reserved beet liquid over the vegetables, season with salt and pepper, and top with the crumbled goat cheese, chives and mint. This is best served just after it's dressed.
Variation: Any pungent cheese, such as Stilton or blue, is delicious in place of goat cheese.
Posted by
Katie B.
at
4:53 PM
6
comments
![]()
Labels: buffalo, burger, cheese-stuffed, fennel, roasted beets, salad, Taste and Create
Friday, July 4, 2008
Pistachio Ice Cream Sammies
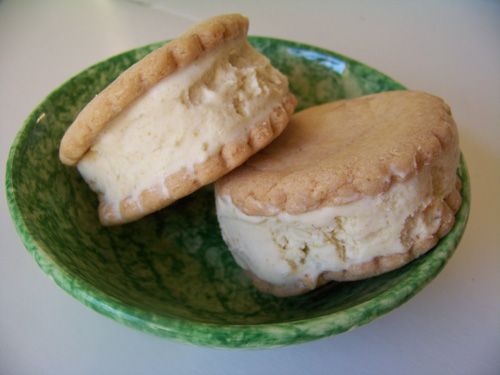
Happy Independence Day!! I don't know about you, but our 4th has been quiet and uneventful. Dave and I slept in, watched some tennis, and went for a walk. Weather permitting, we'll go check out the local fireworks after dinner - and if not, we're off to the movies!
Now, I had been hoping to share our dinner with you today, but on their current schedule, my 7-hour maple baked beans won't be ready until next Tuesday... so I thought I would share this lovely dessert with you instead!
I've said it before, I don't know how I managed so long before pistachios. I have seriously taken every opportunity to work them into some kind of dessert, ANY kind of dessert, that I jumped at the chance when I saw this recipe in Food & Wine magazine. (And I have couple more trapped in Forgotten Draft Land.)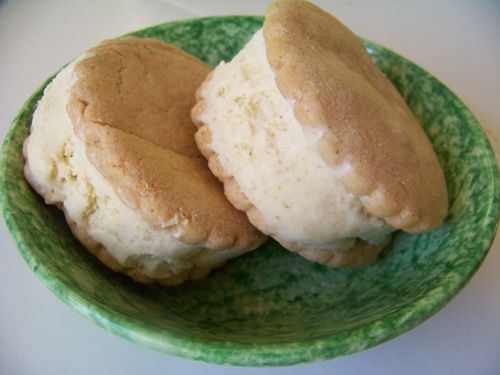 I know what you're thinking, how could I abandon David Lebovitz? I am normally so loyal to his book, Perfect Scoop - how could I branch out? Well, I can say that I gave him a chance. After seeing this recipe, I went to the Perfect Scoop and looked up pistachios... but the only ice cream they are featured in also included a bunch of other stuff (apricots and the like), and while I found it appealing, too, I really wanted a simple, unadulterated pistachio ice cream. I hope he'll forgive me. I blame the cream cheese.
 Jeni Britton does not disappoint. Her pistachio ice cream is exactly what I was looking for. Shining pistachio flavor with a hint of the almond extract, creamy with a wonderful mouth-feel - and not the least bit gritty. I was feeling cheeky, so I baked up some of these butter cookies and made wee ice cream sandwiches. Because we'd nibbled away at a couple of cookies and slurped down so much ice cream, I was only able to put together four sandwiches - which is really sad, because they rocked. For serious.
I want to give a quick shout-out to KitchenAid. While making this, my ice cream attachment sprang a leak. The ice cream was ok - thank goodness - but the bowl was toast. I called KA on a Monday and by Thursday, I had a new bowl in hand. No questions asked and they replaced it. I couldn't be more impressed by their customer service.
I hate to put it all the way at the end like this, but I'm submitting this ice cream to the lovely Nikki's Ice Cream, You Scream Ice Cream Event. Did you know that July is Ice Cream Month? How kick-ass is that? And Nikki thought it fitting that we celebrate it - from the humble flavor to the most extravagant - all are welcome in her event. Please pop over and check out her site - it is wildly informative and a pleasure to read - and make sure you check back later in the month for her ice cream round-up!
Pistachio Ice Cream
c/o Food & Wine Magazine, June 2008
http://www.foodandwine.com/recipes/pistachio-ice-cream
2 cups whole milk
1 tablespoon plus 1 teaspoon cornstarch
1 1/2 ounces cream cheese, softened (3 tablespoons)
1 1/4 cups heavy cream
2/3 cup sugar
1 1/2 tablespoons light corn syrup
1/2 cup toasted pistachios, very finely ground
1/4 teaspoon pure almond extract
1/4 teaspoon kosher salt
Fill a large bowl with ice water. In a small bowl, mix 2 tablespoons of the milk with the cornstarch. In another large bowl, whisk the cream cheese until smooth.
In a large saucepan, combine the remaining milk with the heavy cream, sugar and corn syrup. Bring the milk mixture to a boil and cook over moderate heat until the sugar dissolves, about 4 minutes. Off the heat, gradually whisk in the cornstarch mixture. Return to a boil and cook over moderately high heat until the mixture is slightly thickened, about 1 minute.
Gradually whisk the hot milk mixture into the cream cheese until smooth. Whisk in the pistachios, almond extract and salt. Set the bowl in the ice water bath and let stand, stirring occasionally, until cold, about 20 minutes.
Strain the ice cream base into an ice cream maker, pressing the pistachios with the back of a spoon to extract all the flavor, and freeze according to the manufacturer’s instructions. Pack the ice cream into a plastic container.
Press a sheet of plastic wrap directly onto the surface of the ice cream and close with an airtight lid. Freeze the pistachio ice cream until firm, about 4 hours.
Posted by
Katie B.
at
5:02 PM
5
comments
![]()
Labels: Food and Wine, ice cream, Jeni Britton, pistachio
Thursday, July 3, 2008
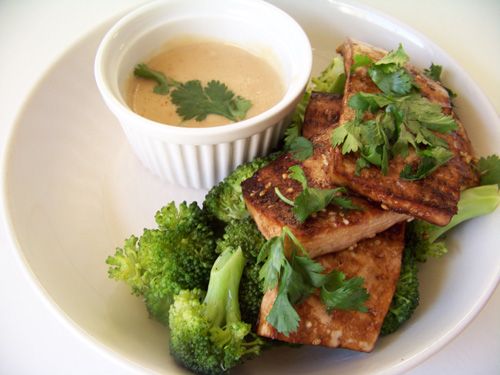
Sesame Roasted Tofu with Satay Sauce and Broccoli
I'm not sure when I talked myself out of worrying about it, but I did. After a handful of failed attempts at Tastespotting, I realized that I'm just not one to individually wrap my cookies and brownies in ribbons... maybe someday (because it certainly makes for a pretty picture.) This is not to say that I'm not still a big fan of Tastespotting - because I am. It is a visually stunning way to meet new bloggers and get dinner ideas.
However, with Tastespotting's stall due to legal issues, Food Gawker stepped in to fill the void. Same basic principle, same amazing submissions. Everyone is happy. Except, TS is back. And now with both in my Google Reader, I pop in to "catch up" and find I have 300+ entries! Whoa baby! Both are lovely - and users seem to submit to both... but it leads to duplicates... Which leads me to... who to choose? I feel like need to decide... and I have no idea which way to lean. I know how overwhelming to seems to have so many entries to read (too much pressure!)... Do you have a similar problem? If you are feeling the same way, how would you choose?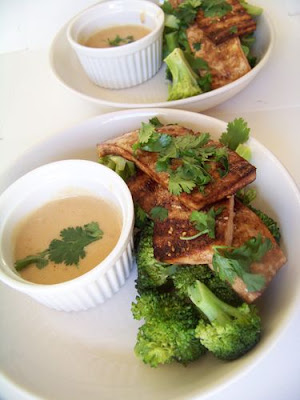
On to the recipe! I'd never made a satay sauce before - but it read so beautifully in Rose Eliot's Vegetarian Supercook, I just had to give it a try. As much as I know Dave will eat whatever I put in front of him (I love that he trusts me like that), I still worry when I add tofu to the menu. I shouldn't have, though, because as simply as the tofu is prepared (a simple soak in soy sauce and sprinkled in sesame seeds), the satay sauce really makes the dish.
I myself was a little worried when I first assembled the sauce in the pot, it didn't taste like much - it even seemed a little bland. (I thought I was screwed.) Have faith, though, because once the sauce heats up and the flavors have a chance to meld, it's amazing. Creamy, with a nice punch of heat from the ginger, garlic and chili flakes. Both the tofu and the broccoli were lovely dipped in the sauce.
My resident tofu-squeamish husband liked it so much, he had seconds - so if you're skittish, too - this would be a good way to get your toes wet!
c/o Vegetarian Supercook, by Rose Elliot
http://www.amazon.com/Vegetarian-Supercook-Rose-Elliot/dp/0600615677/ref=sr_1_1?ie=UTF8&s=books&qid=1214341705&sr=8-1
Serves 4.
1 lb tofu, drained
4 tablespoons soy sauce
2 tablespoons roasted sesame oil
2 tablespoons sesame seeds
2 medium-sized bunches of broccoli, trimmed and broken into florets
Sauce
4 heaped tablespoons peanut butter (smooth or crunchy)
1 14-ounce can coconut milk
2 garlic cloves, crushed
2 teaspoons grated fresh ginger root
½ teaspoon dried red chili flakes
2-3 teaspoons honey
4 tablespoons chopped cilantro, to garnish
Blot tofu dry on paper towels and cut into thin strips about ¼ inch thick. Put the strips on a plate in a single layer, pour the soy sauce on top, then turn the strips so that they are all coated.
Heat the sesame oil in a grill pan or shallow roasting pan under a preheated hot broiler. Put the tofu strips in the pan in a single layer and scatter with half the sesame seeds. Immediately turn them over and coat with the remaining sesame seeds.
Put the pan back onto or under the heat and grill or broil for about 10 minutes, or until the tofu is crisp and browned, then turn the pieces over and broil or grill on the other side.
Meanwhile, make the satay sauce. Put the peanut butter into a saucepan and gradually stir in the coconut milk to make a smooth sauce, then add the garlic, ginger, and chili. Heat gently, taste, and add honey to taste. Remove from the heat and set aside until required.
About 5-10 minutes before the tofu is ready, heat ½ inch depth of water in a large saucepan and bring to a boil. Add the broccoli, cover, and cook for 4-5 minutes, or until just tender. Drain.
Put some broccoli, tofu, and a serving of satay sauce on each plate, scatter the sauce with some cilantro and serve.
Posted by
Katie B.
at
8:57 PM
4
comments
![]()
Labels: broccoli, satay sauce, tofu, Vegetarian Supercook
Tuesday, July 1, 2008
TwD: Apple Cheddar Scones
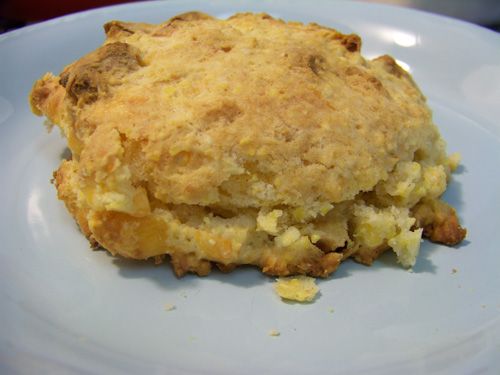 It's been a few weeks since my last Tuesdays with Dorie entry... June was a bit of a busy and stressful month. Not even knowing what this week would hold, I promised myself and my fellow TwDers that I would participate (well, I whispered, so if you guys didn't hear me, that's why!) I couldn't have been more pleased that Karina chose these scones. Don't get me wrong, I love pies and brownies as much as the next baker, but I have a lot of love for everything breakfast food related - and these scones strike a nice balance between sweet and savory... just can't be beat.
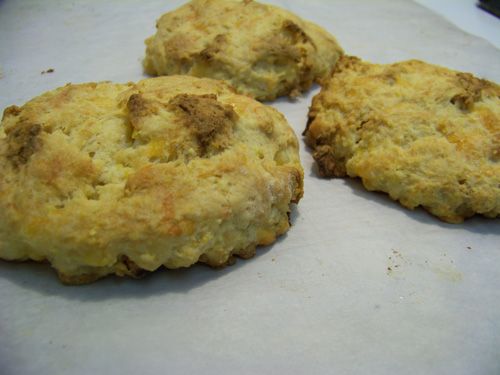 These scones are close to drop biscuits, but denser. The dried apple provided a nice, thoughtful chewiness that I found really appealing. Now, I don't normally like cheddar - but it worked really well in the scones. It wasn't the least bit over-powering - and I didn't even notice it in each bite - in fact, I rather liked it. Shocking, I know. The dough was wicked sticky - so be prepared. I didn't want to go with the traditional triangle, so I tried to use a biscuit cutter... it mostly worked (not that you can tell), but it made for a sticky fun experience.
As an added crunch, I substituted polenta for the cornmeal (as I found I didn't have any). The polenta-crunch was certainly different, but enjoyable. I sometimes find store-bought scones to be a little uninspired and boring, and these were neither of those things.
Please see Karina's blog, The Floured Apron, for the recipe, and head on over to Tuesdays with Dorie to see other marvelous ways to make a scone!
Posted by
Katie B.
at
9:26 AM
18
comments
![]()
Labels: cheddar, dried apple, scones, Tuesdays with Dorie, TwD


